Watch Quick Video
POS Sales Analytics Account App
POS Sales Analytics Account App
tags every Point of Sale order with an analytic account. This allows you to see exactly which project,
branch or department earned the revenue in your reports. You are able to set up the analytic account from
the Point of Sale itself, from a product or from a customer and it is applied to every order without any
manual work.
In the POS settings, the user can define a Default Analytic Account for each Point of Sale. An analytic
account may also be put on a product or on a customer contact form. Simple priority: on an order the
cashier's choice comes first, then the customer's account, then the Point of Sale default. The product
account comes first on an order line, followed by the order account.
If you enable Allow Analytic Selection in POS, cashiers see an Analytic Account button on the POS screen
and choose the account for each order. Refunds always go back to the original order so a return falls into
the same analytic account as the sale. Your analytic reports are accurate because the analytic account is
copied to the customer invoice lines and to the sales journal items generated when a POS session is
closed.
POS Sales Analytics Account App
- In POS settings define a default analytic account for each Point of Sale.
- Set analytic accounts on products and customers to automatically tag POS orders.
- Let cashiers select the Analytic Account on each order directly from the POS screen.
- Refunds are automatically credited to the analytic account of the original order.
- The customer invoices and sales journal entries of closed POS sessions are posted to the analytic account. Manual correction No
Complete Workflow for Manage POS Sales Analytics Account App
Install the POS Sales Analytics Account App module and make sure Analytic Accounting is enabled in your accounting settings. Then open your Point of Sale settings and, in the POS Analytic Account block, choose a Default Analytic Account for that POS. Turn on Allow Analytic Selection in POS if you want cashiers to choose the account themselves. Optionally, set an Analytic Account on a customer's contact form, or a POS Analytic Account on a product that is available in POS. These are applied to new orders automatically. At the Point of Sale, the cashier can click the Analytic Account button on the order screen and select an account, or choose Default to use the automatic one. If nothing is picked, the order uses the customer's account first and the POS default second, and each order line uses its product's account first and the order account second. Refunds copy the analytic account of the original order. The selected account is visible on the order and on each order line under Point of Sale > Orders. It is copied to the invoice lines of invoiced orders, and to the sales journal items created when the POS session is closed, keeping your analytic reports accurate without any manual correction.
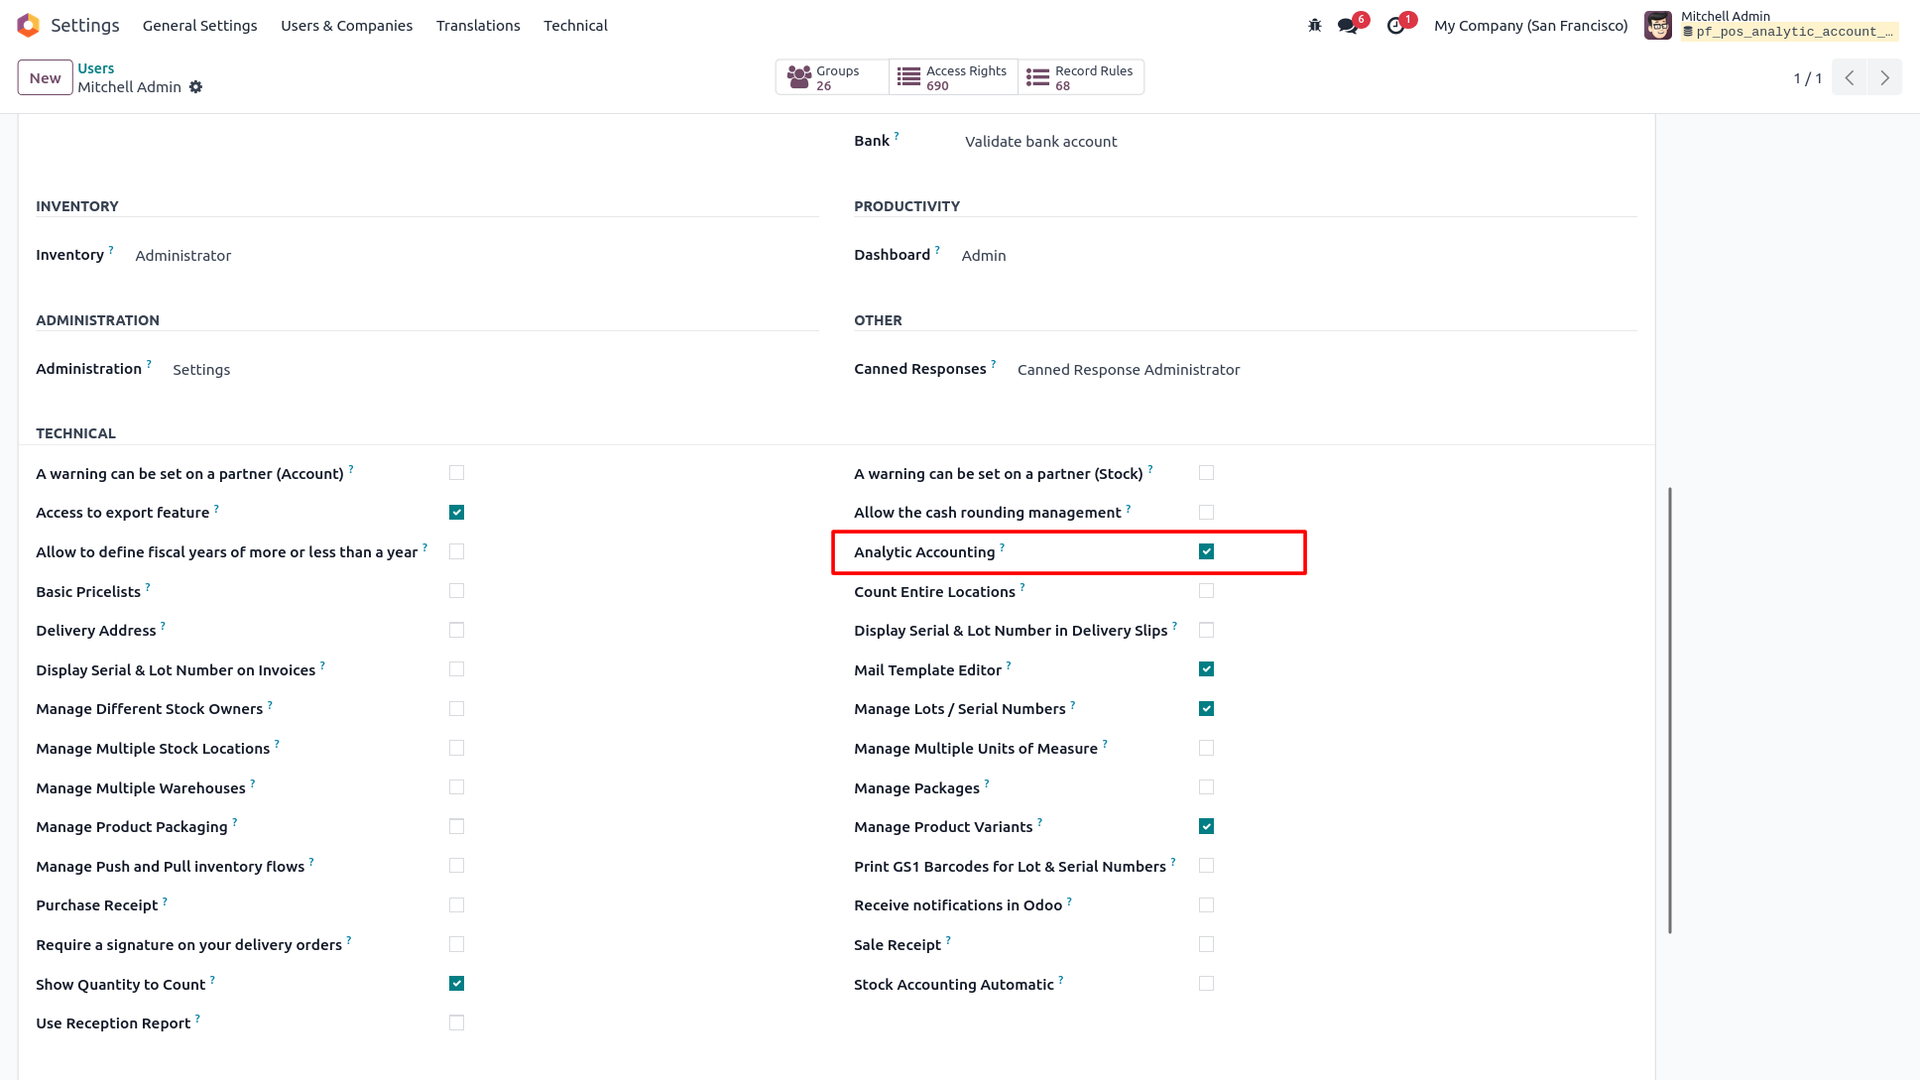
1. Activate Developer Mode, then open Settings > Users, select the user and enable the Analytic Accounting checkbox under the Technical section.
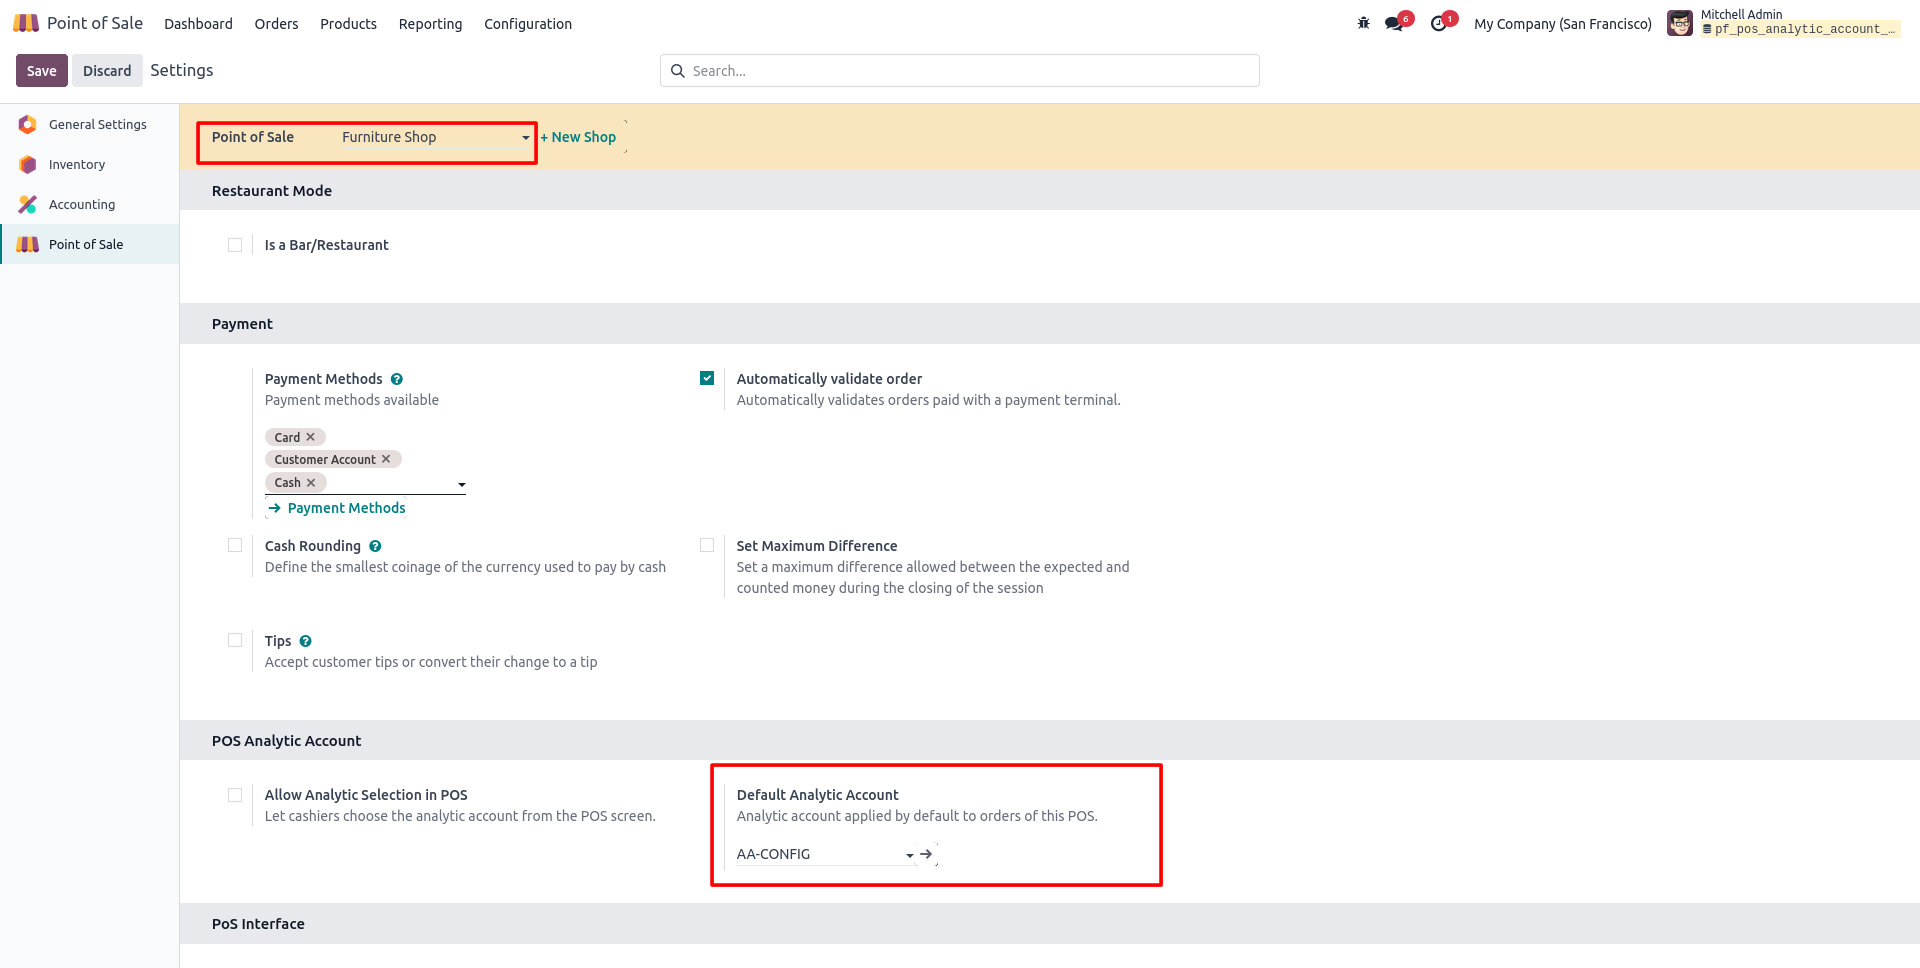
2. In Point of Sale > Settings, select your Point of Sale and choose the Default Analytic Account in the POS Analytic Account block.
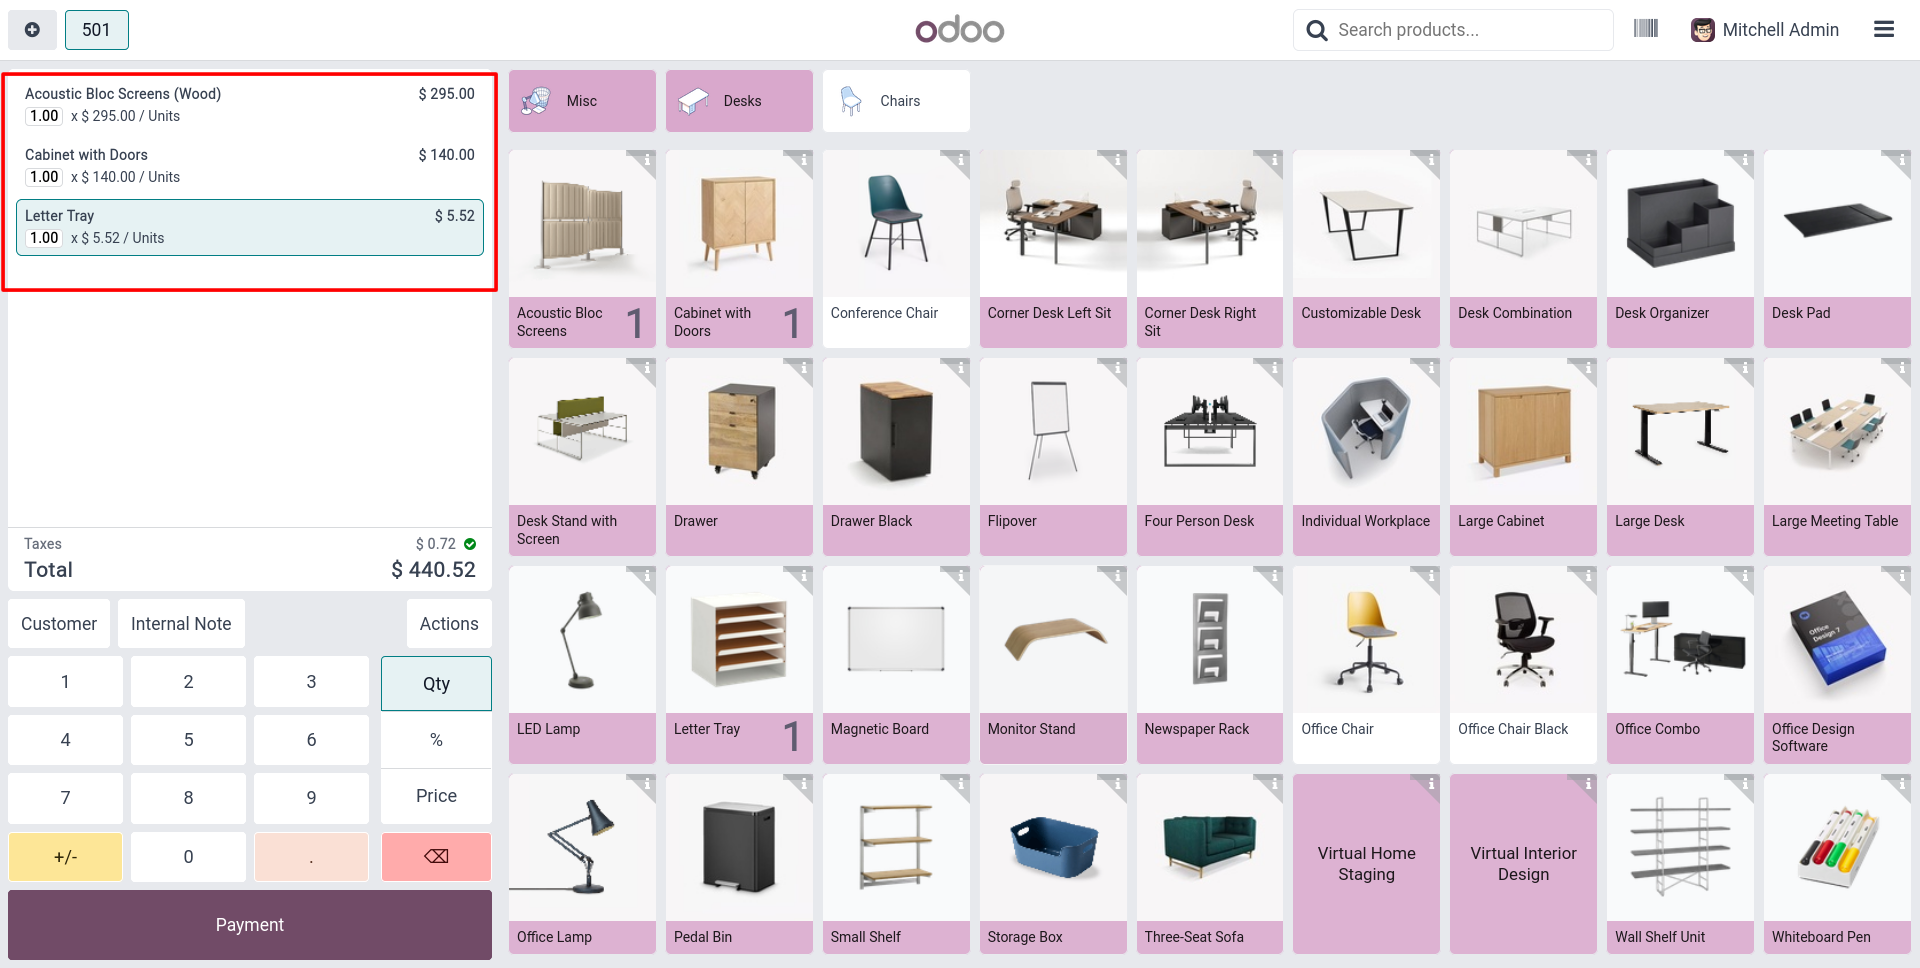
3. Open the POS session, add products to the order and proceed to Payment. The default analytic account is applied automatically.
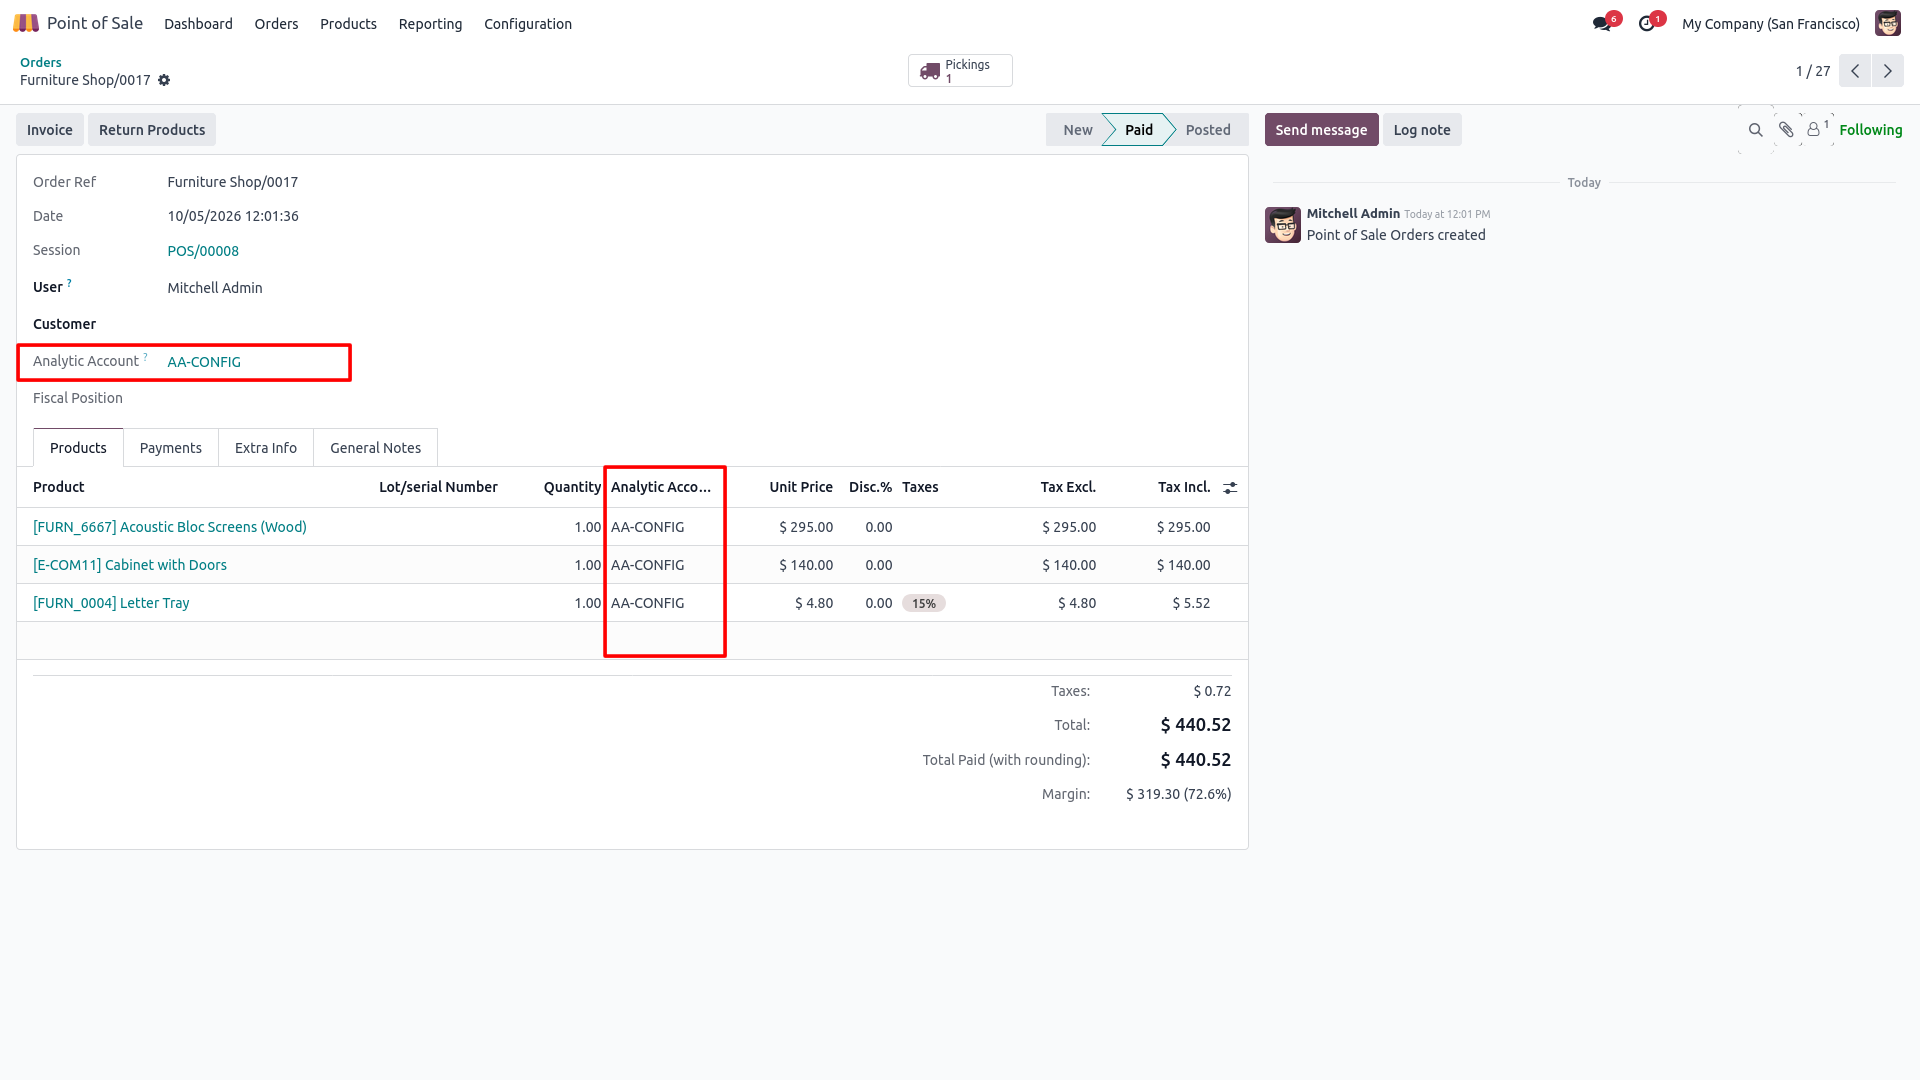
4. Open the order from Point of Sale > Orders. The Analytic Account shows on the order and on every product line.
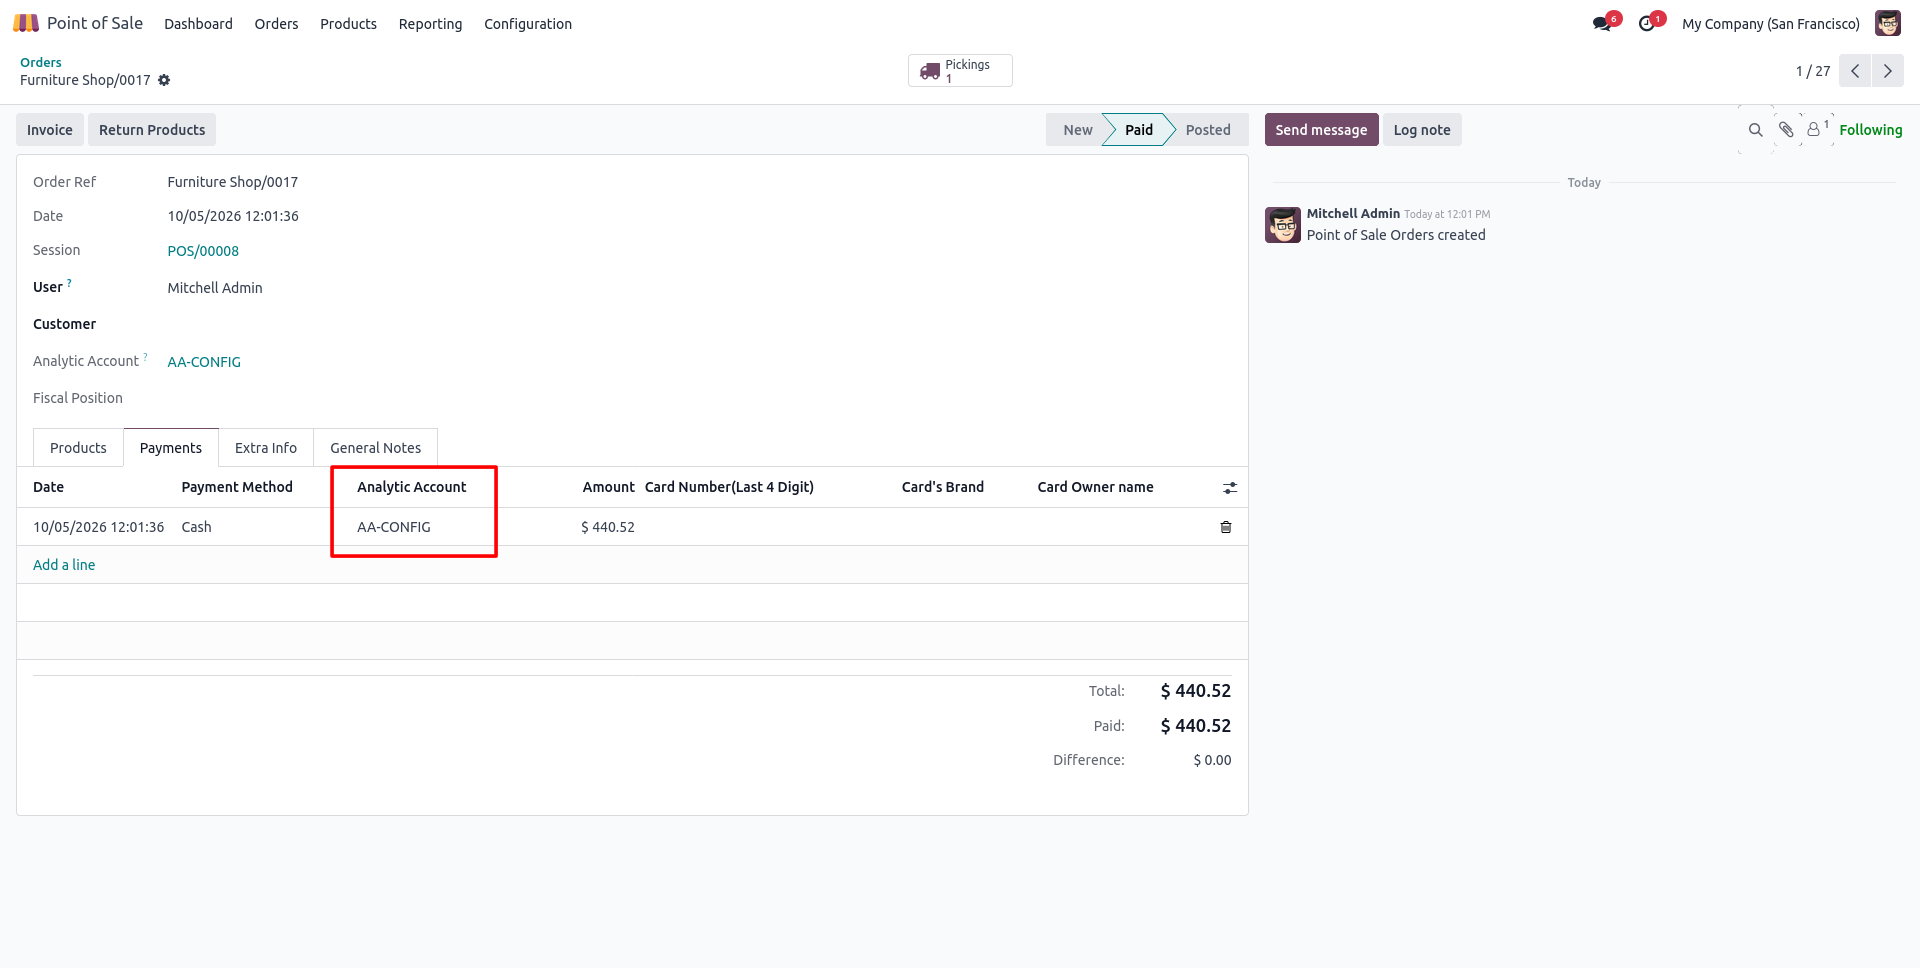
5. In the Payments tab of the order, the Analytic Account column shows the same account for the payment line.
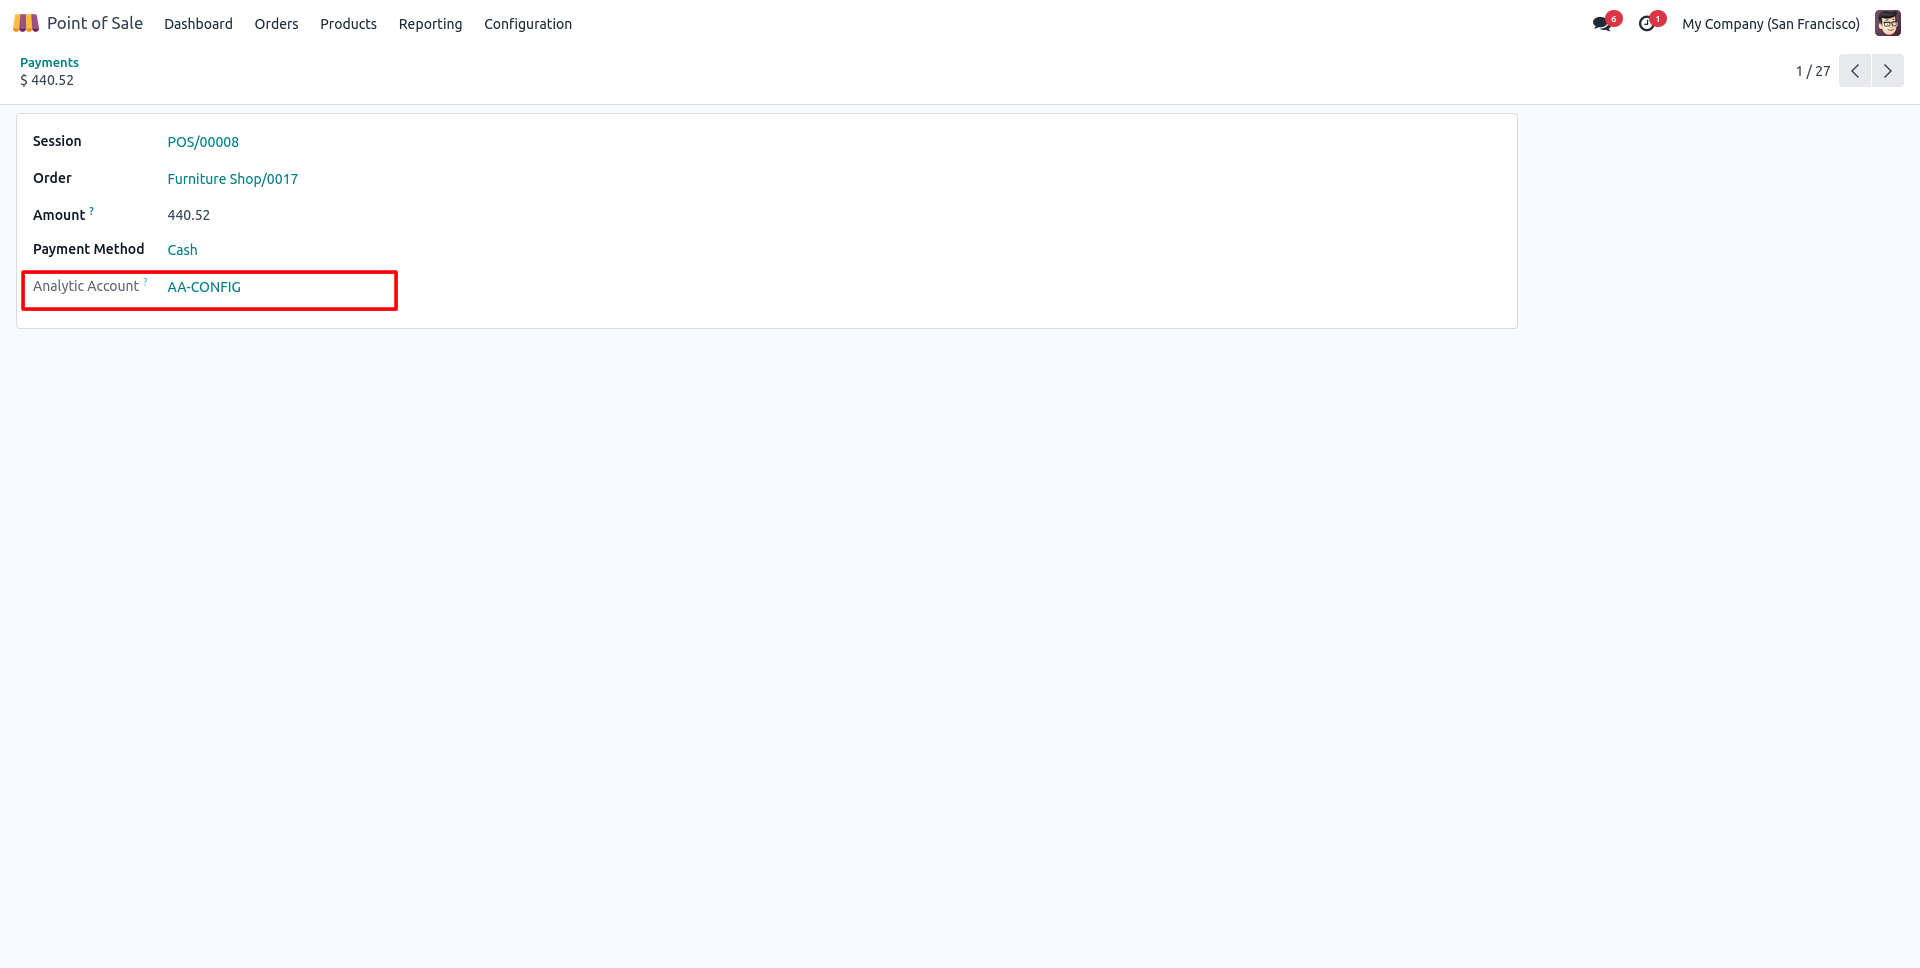
6. Open the payment from Point of Sale > Orders > Payments. The Analytic Account of the order is shown on the payment record.
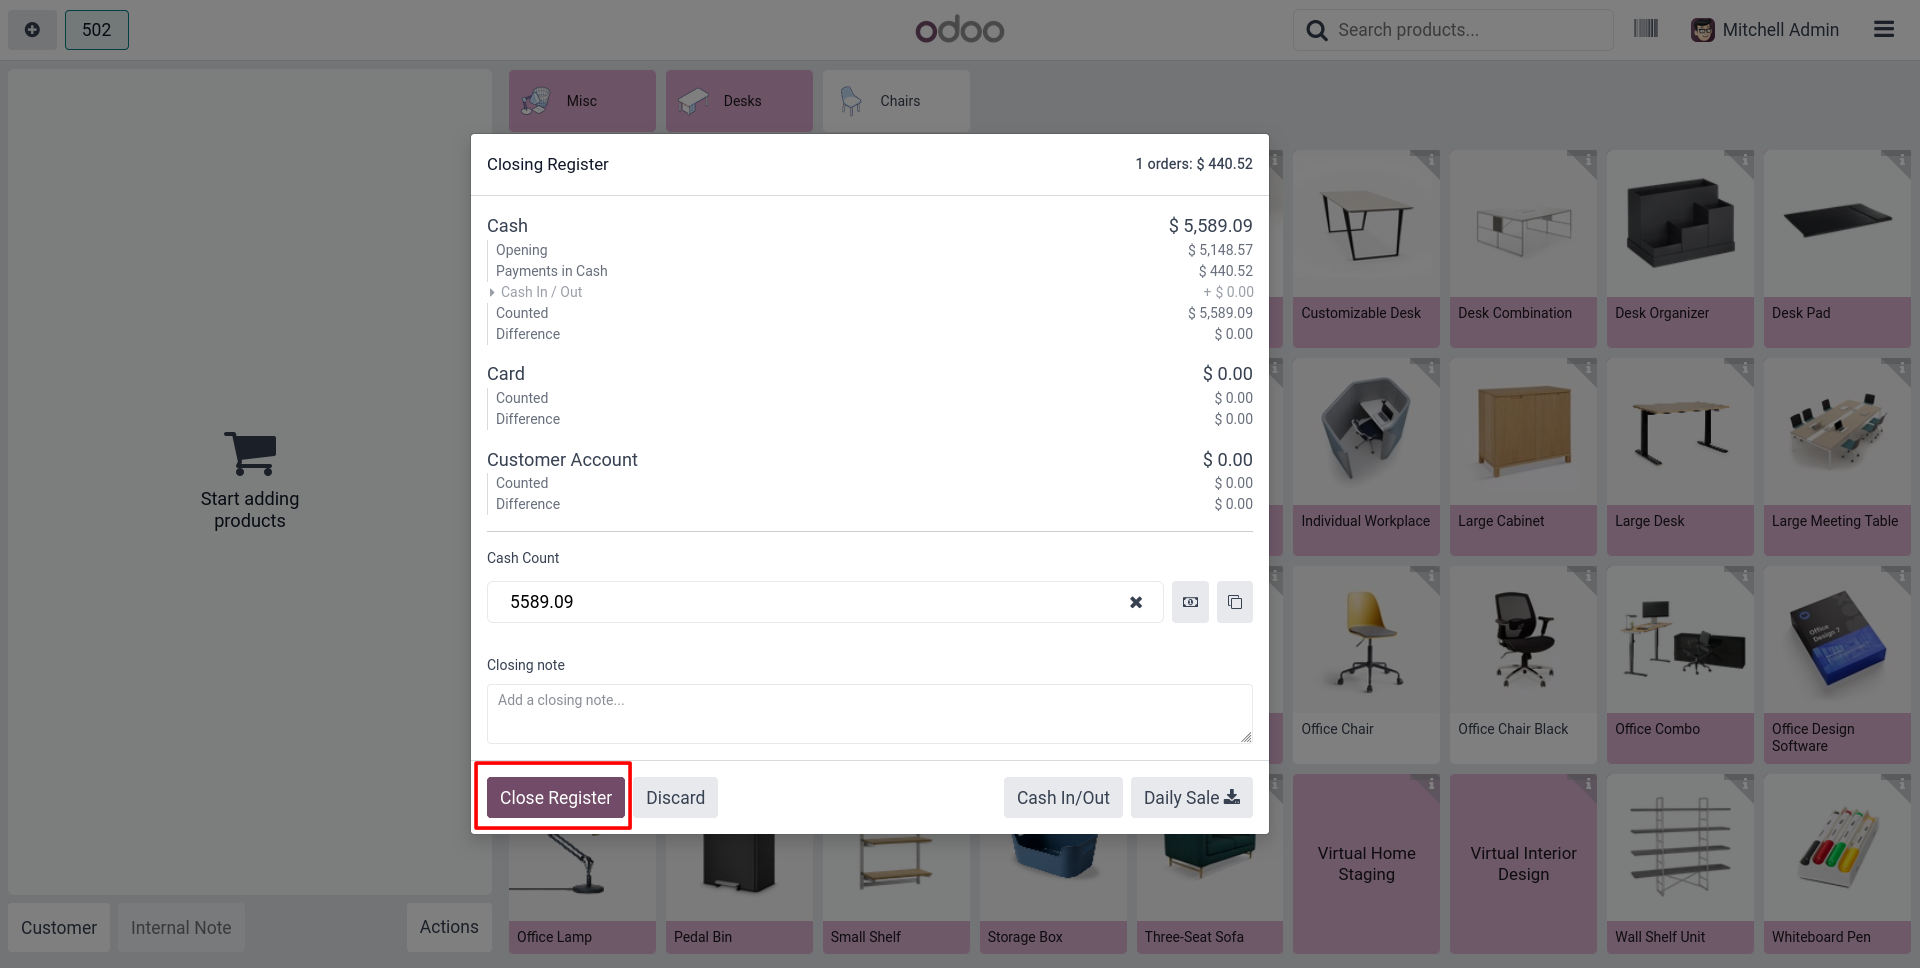
7. When the shift is over, open the Closing Register popup in the POS screen, check the counted amounts and click Close Register.
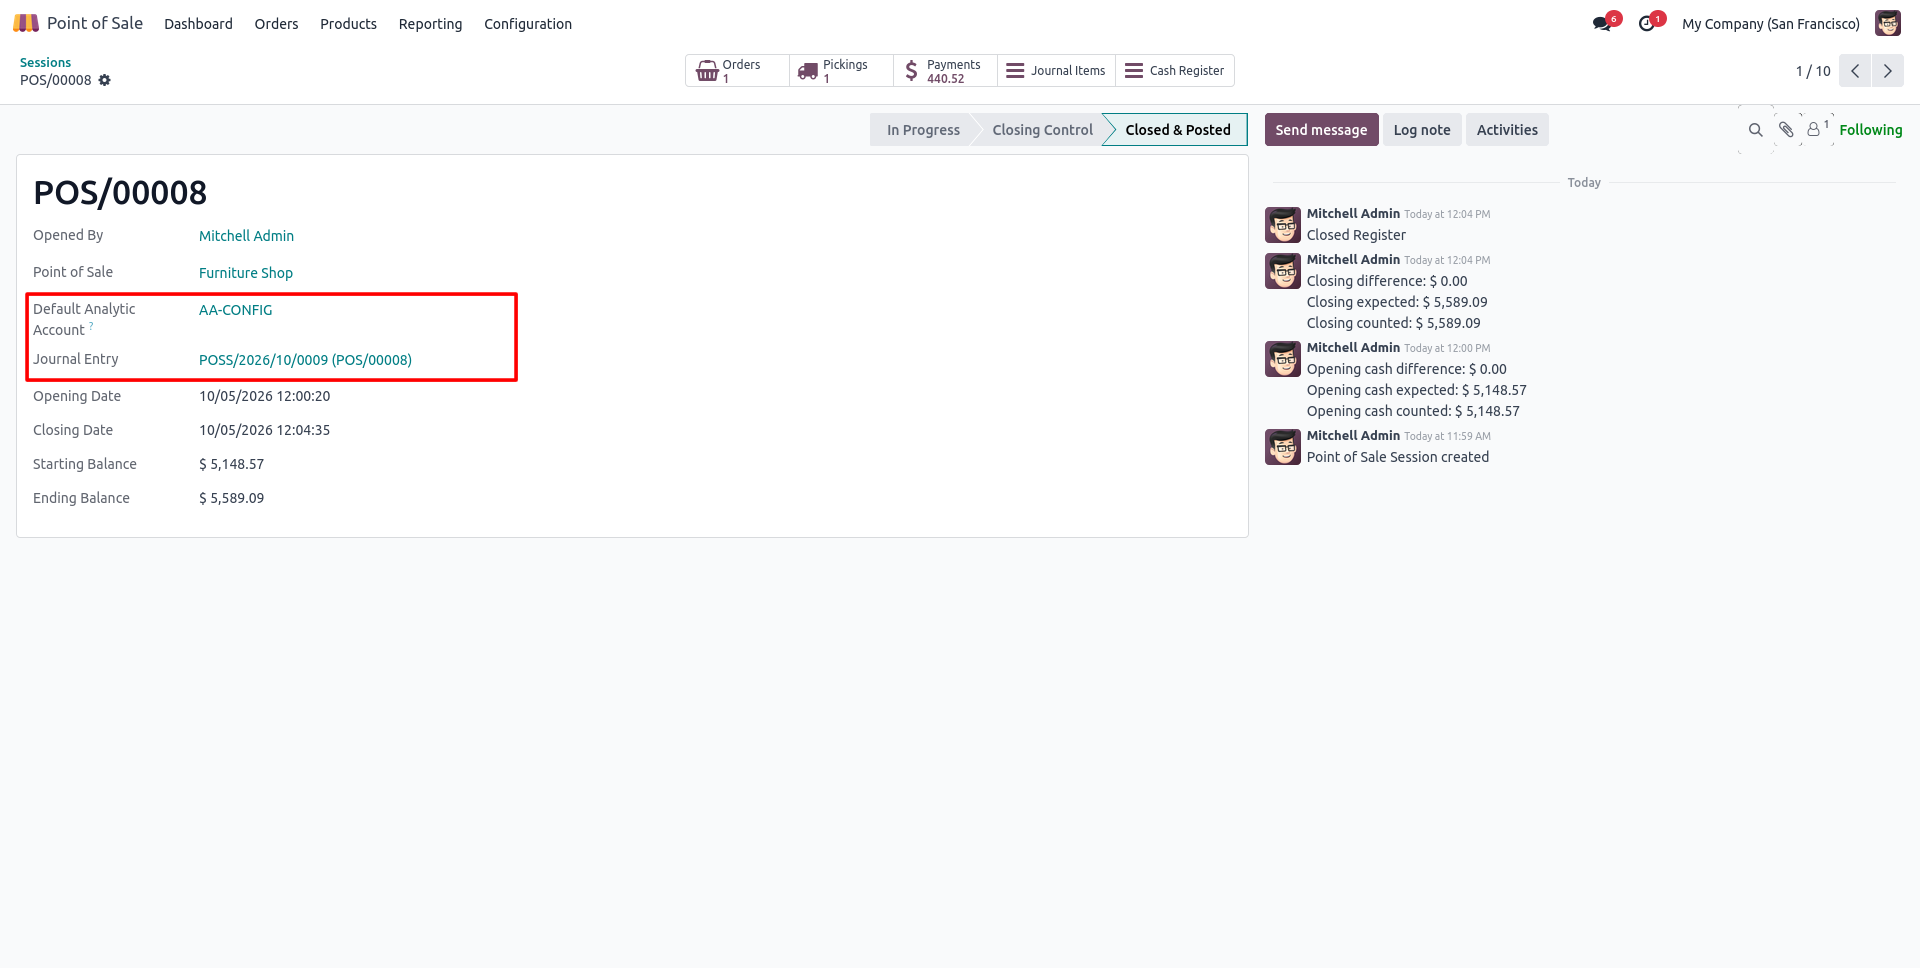
8. The session moves to Closed & Posted. The Default Analytic Account is shown on the session, along with the generated Journal Entry.
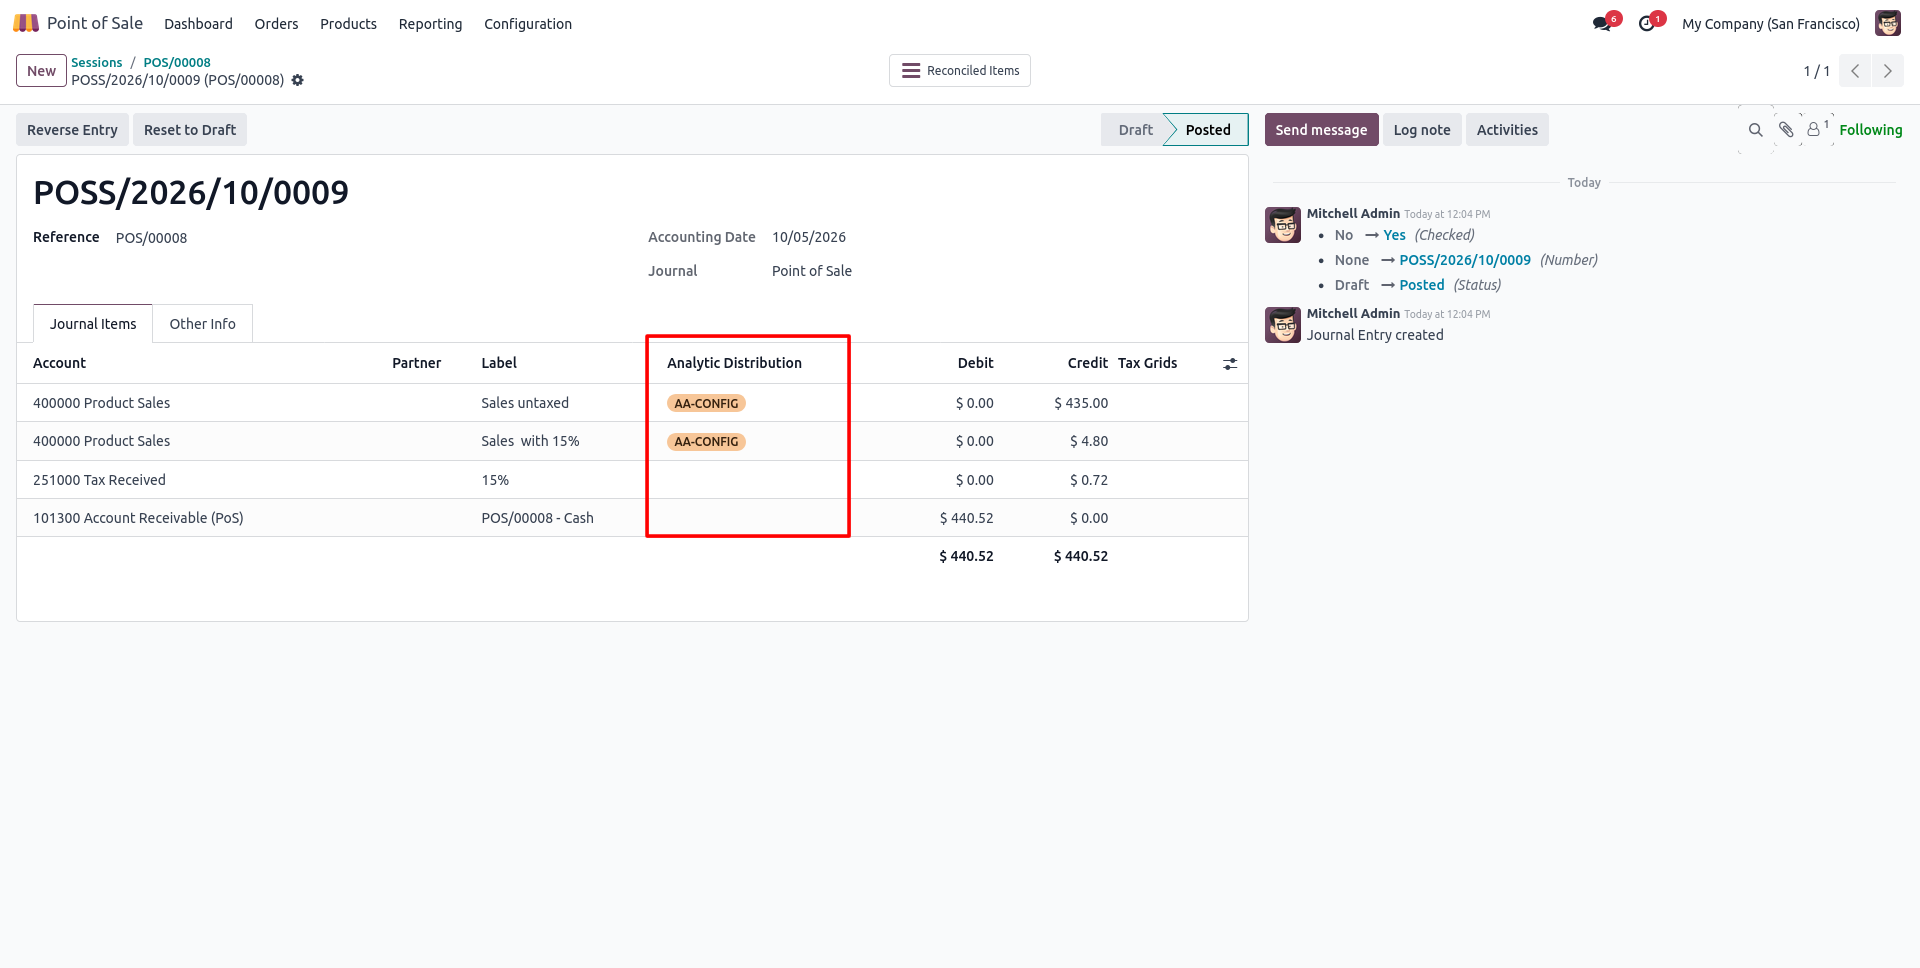
9. Open the Journal Entry of the session. The sales lines carry the analytic account in the Analytic Distribution column.
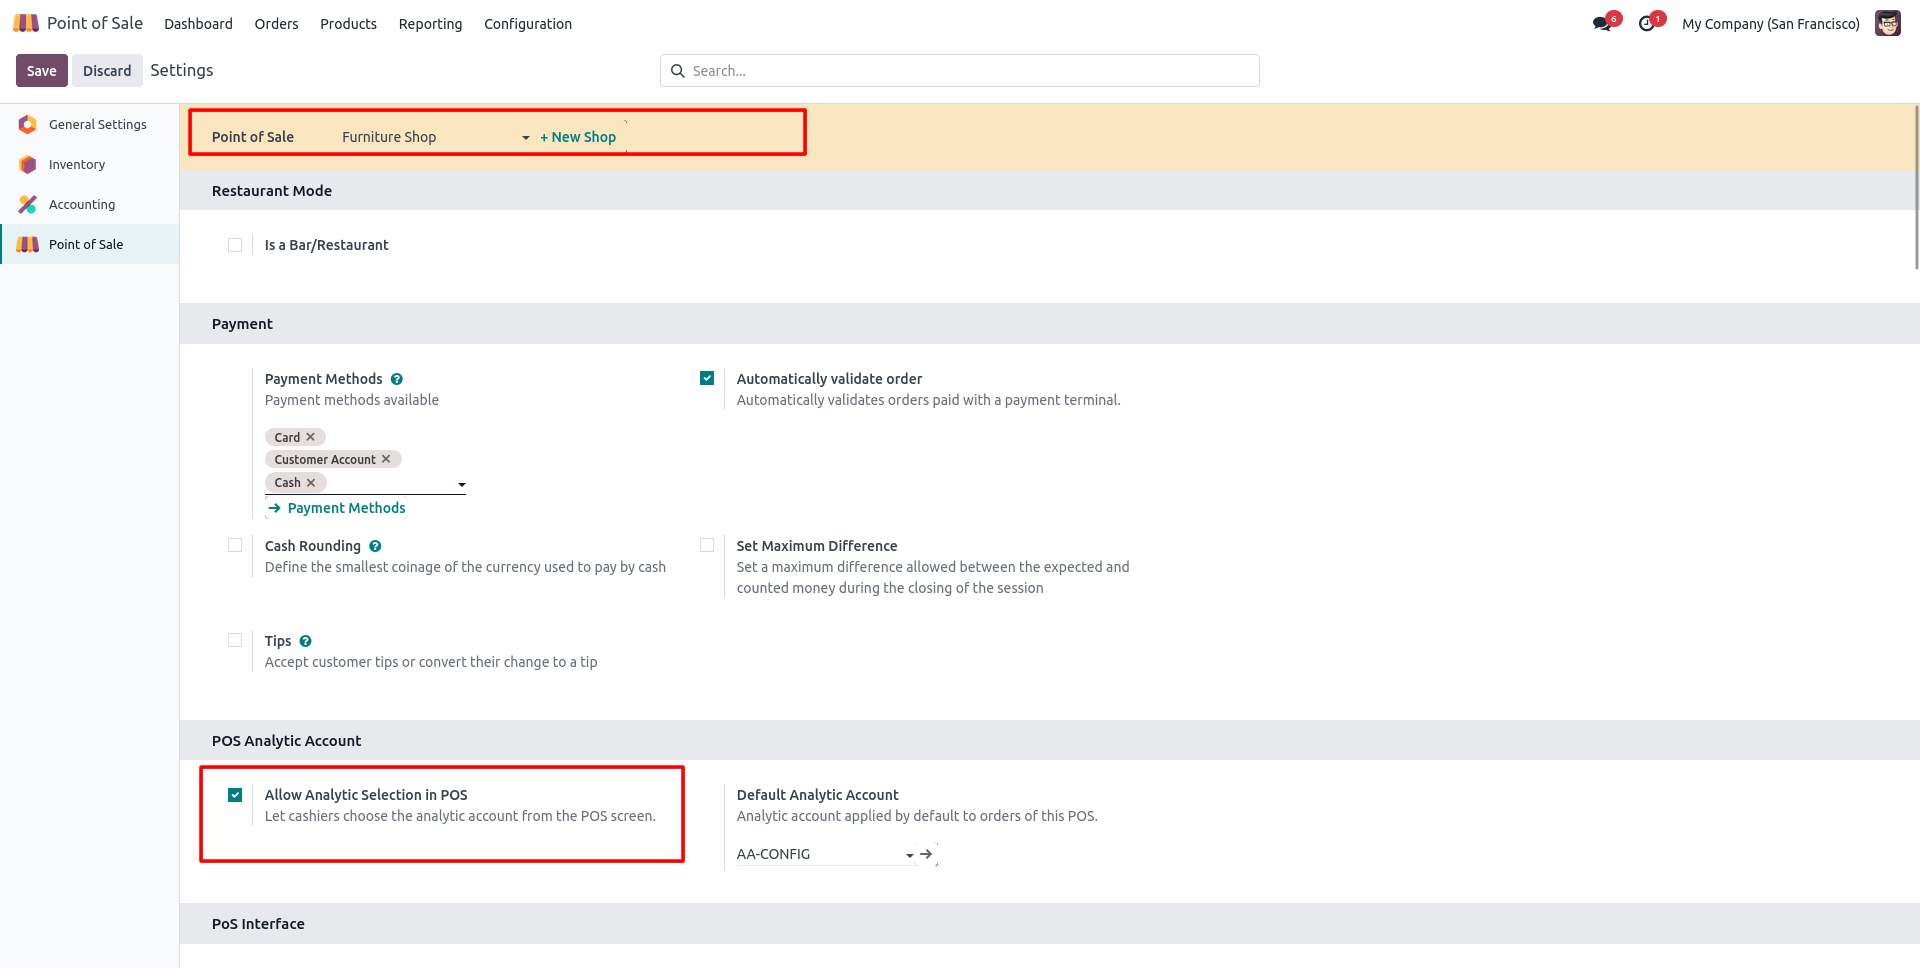
10. To let cashiers choose the account themselves, enable Allow Analytic Selection in POS in the POS Analytic Account block of the Point of Sale settings.
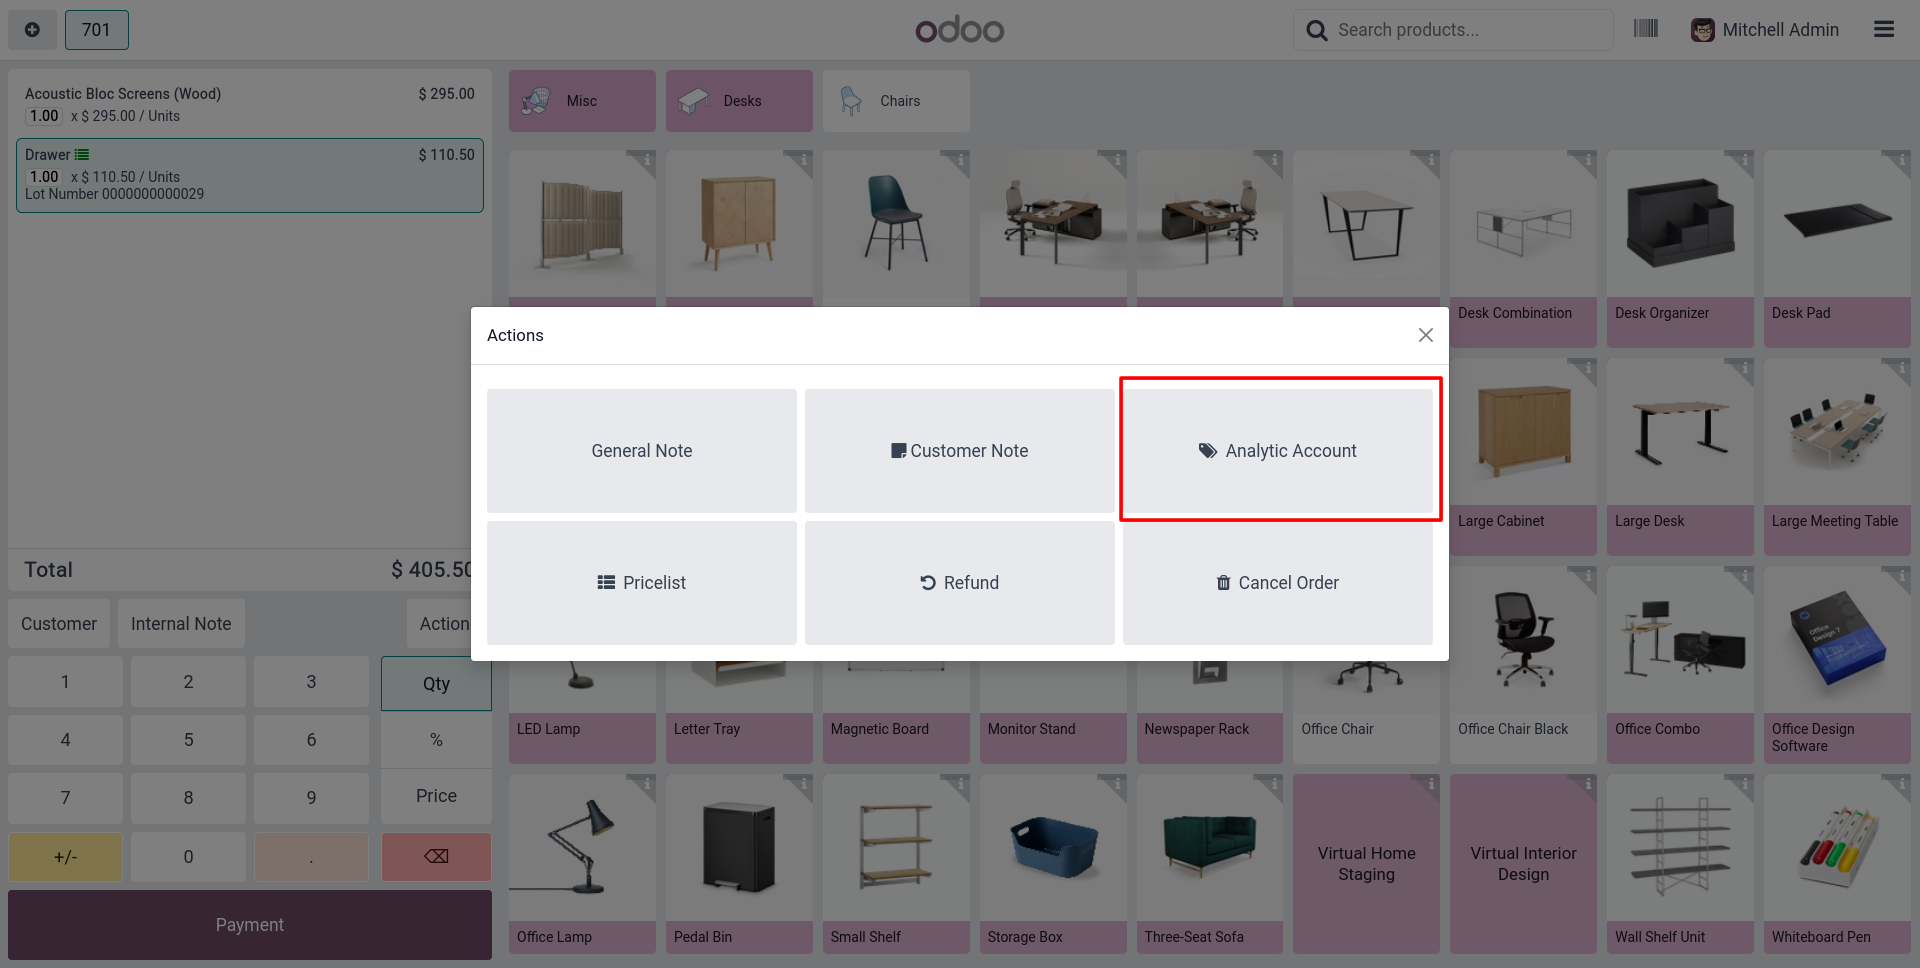
11. On the POS order screen, click Actions and select the Analytic Account button.
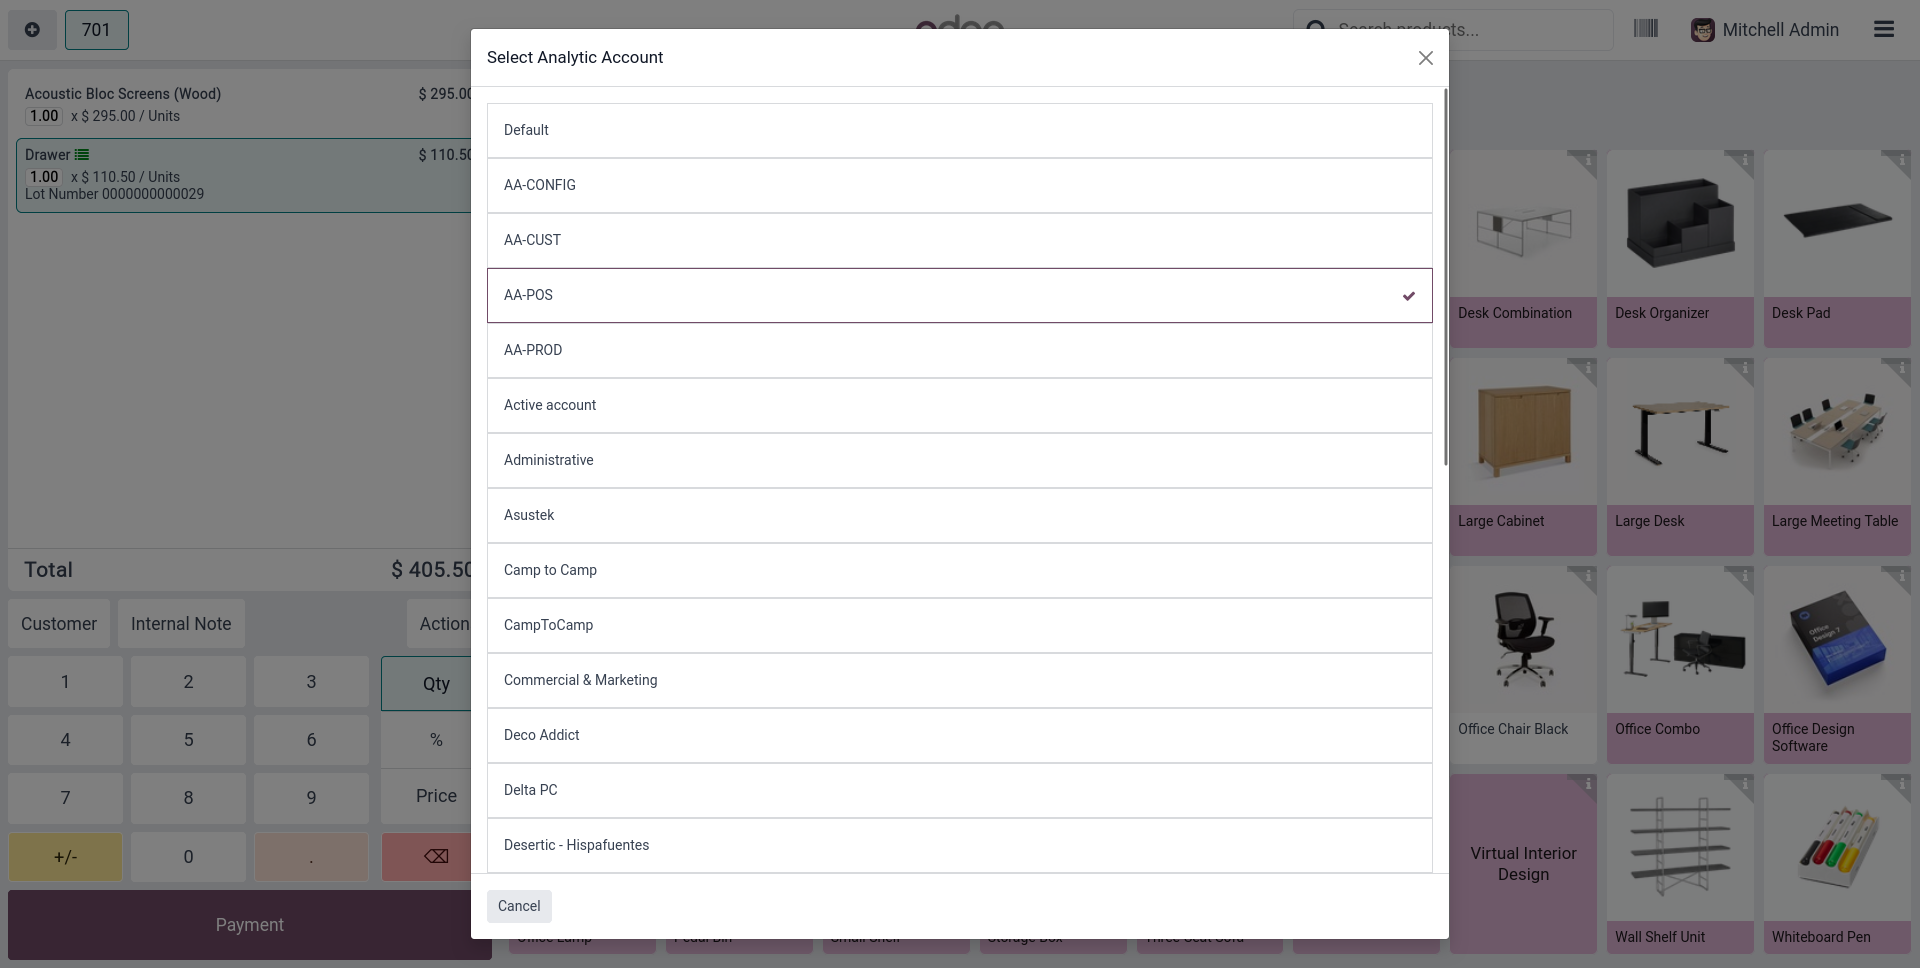
12. In the Select Analytic Account popup, choose an analytic account for the order. Select Default to use the automatic one.
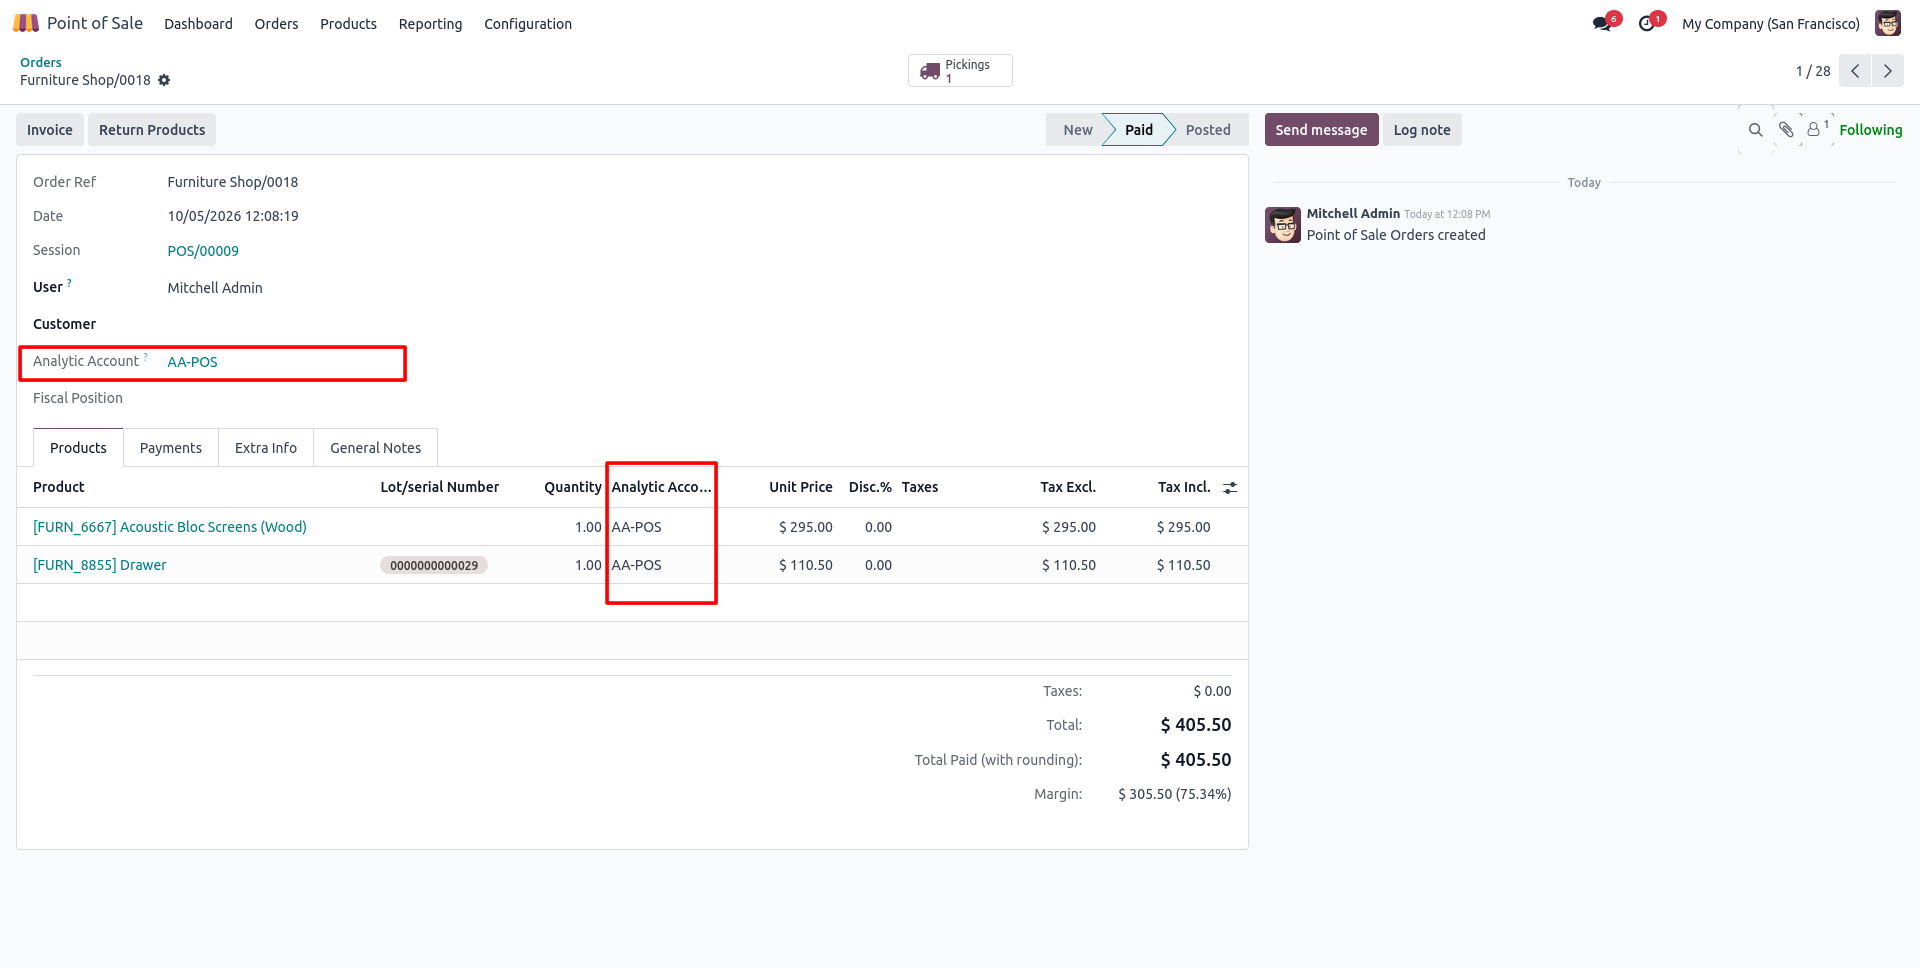
13. After payment, the order in Point of Sale > Orders shows the account chosen by the cashier on the order and on every product line.
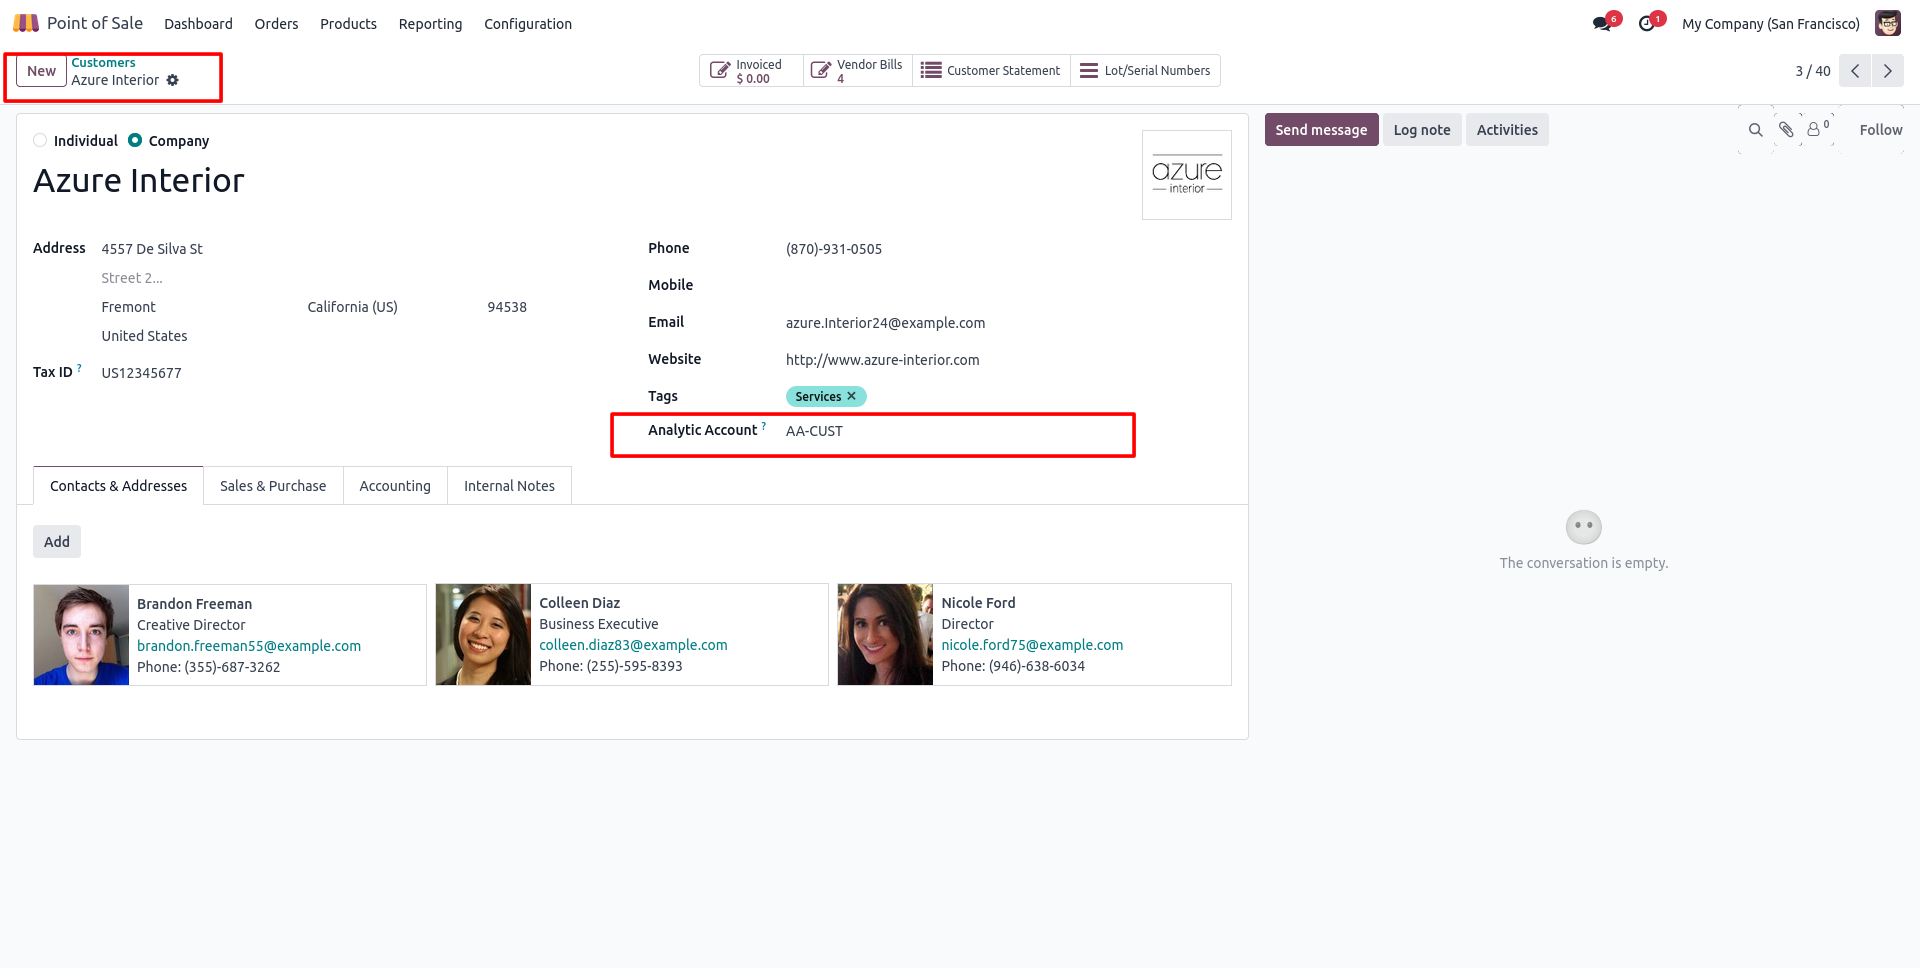
14. To tag orders by customer, set an Analytic Account on the customer's contact form.
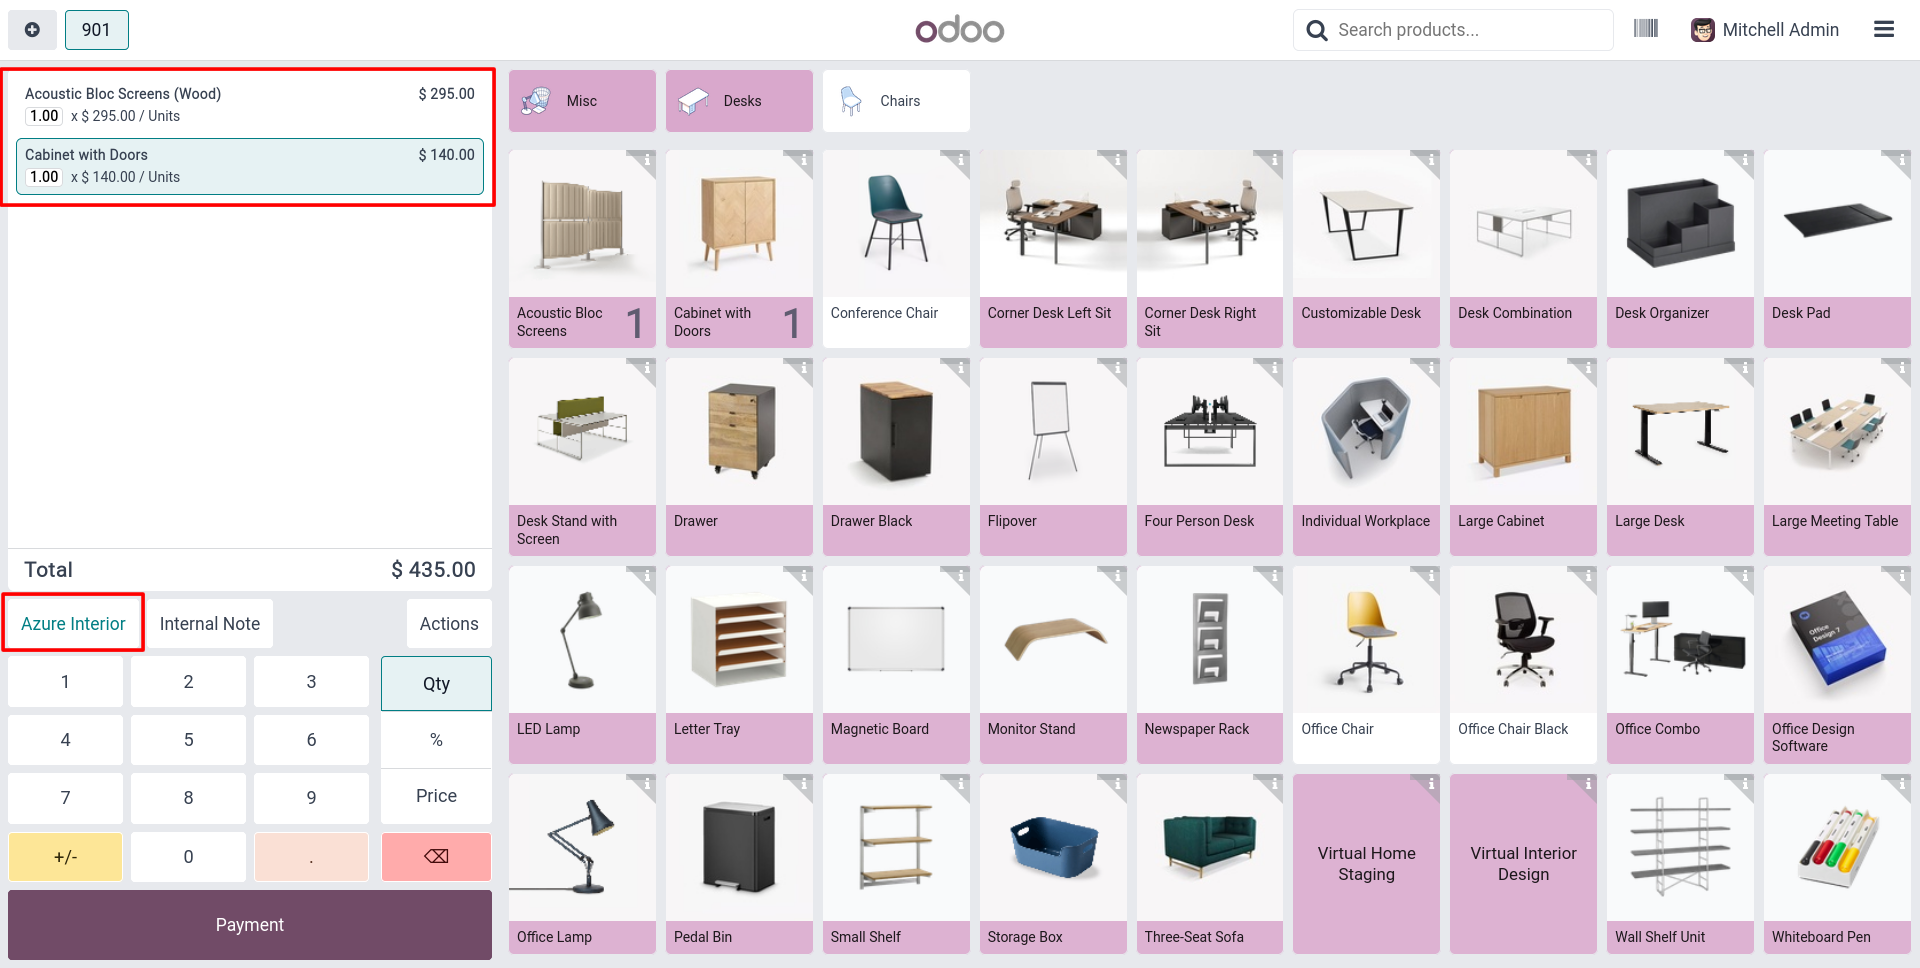
15. On the POS screen, select that customer and add products to the order. The customer's analytic account is applied automatically.
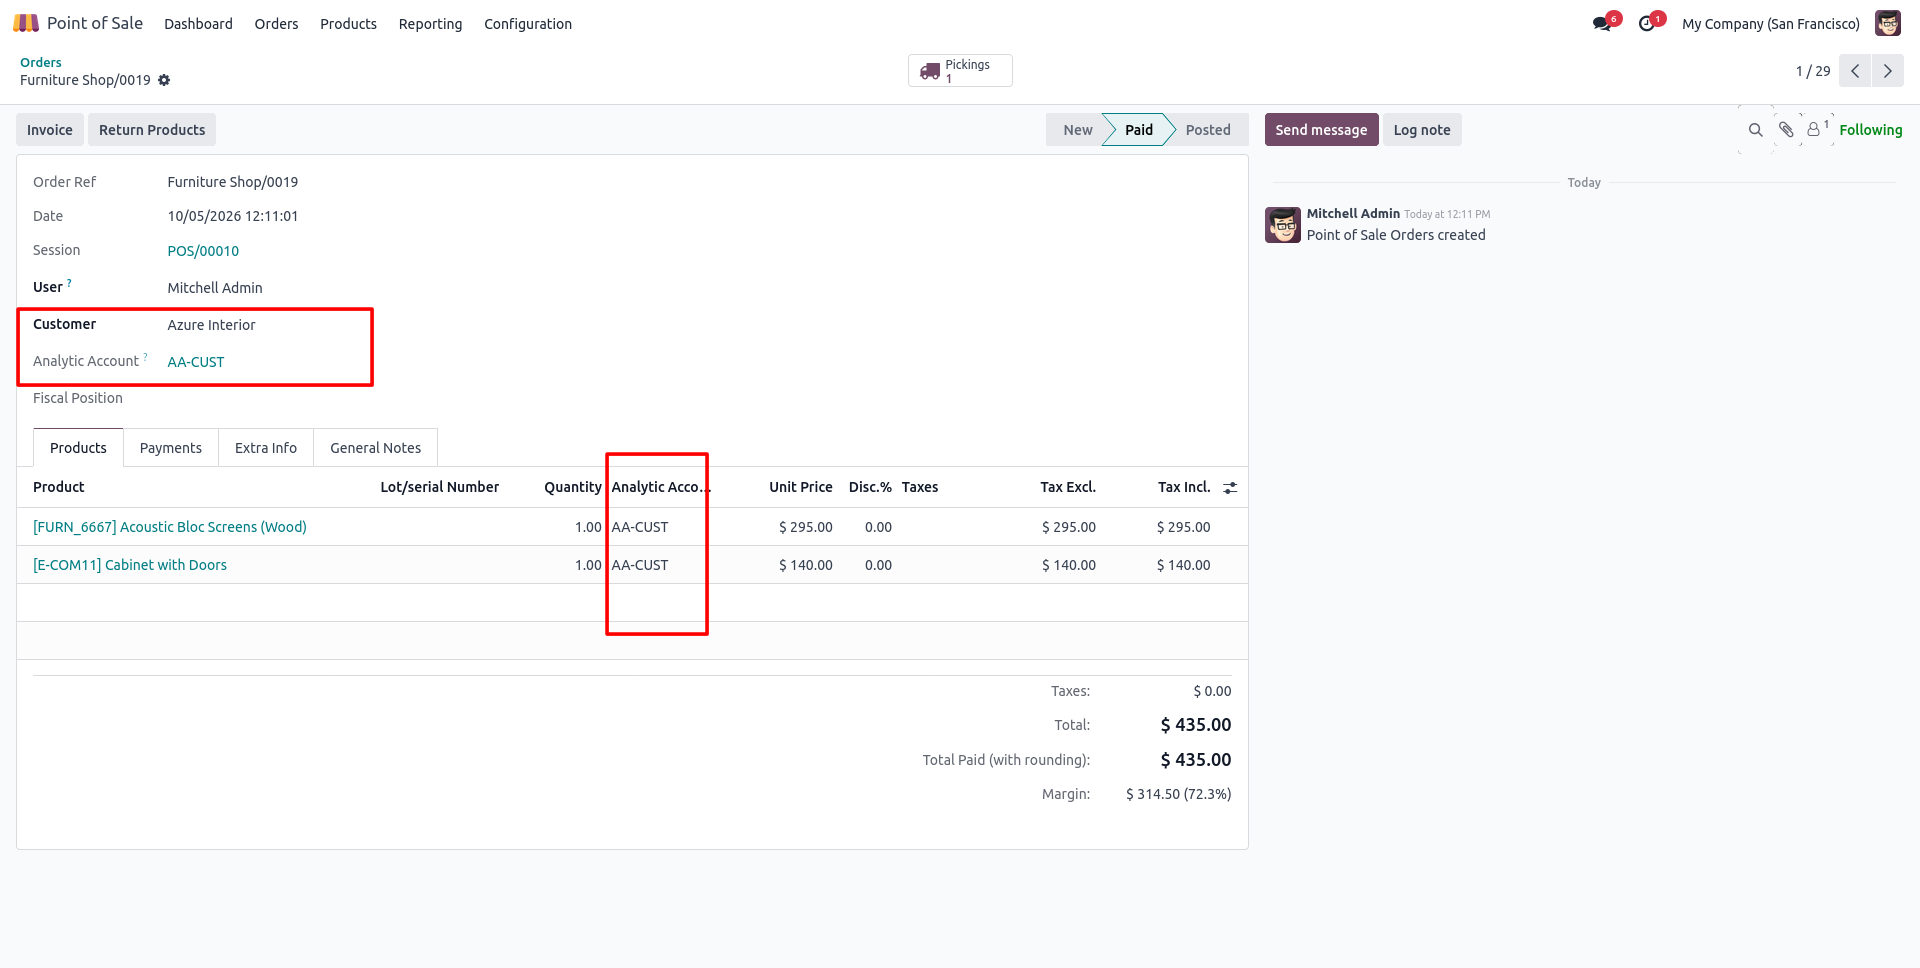
16. After payment, the order in Point of Sale > Orders shows the customer's Analytic Account on the order and on every product line.
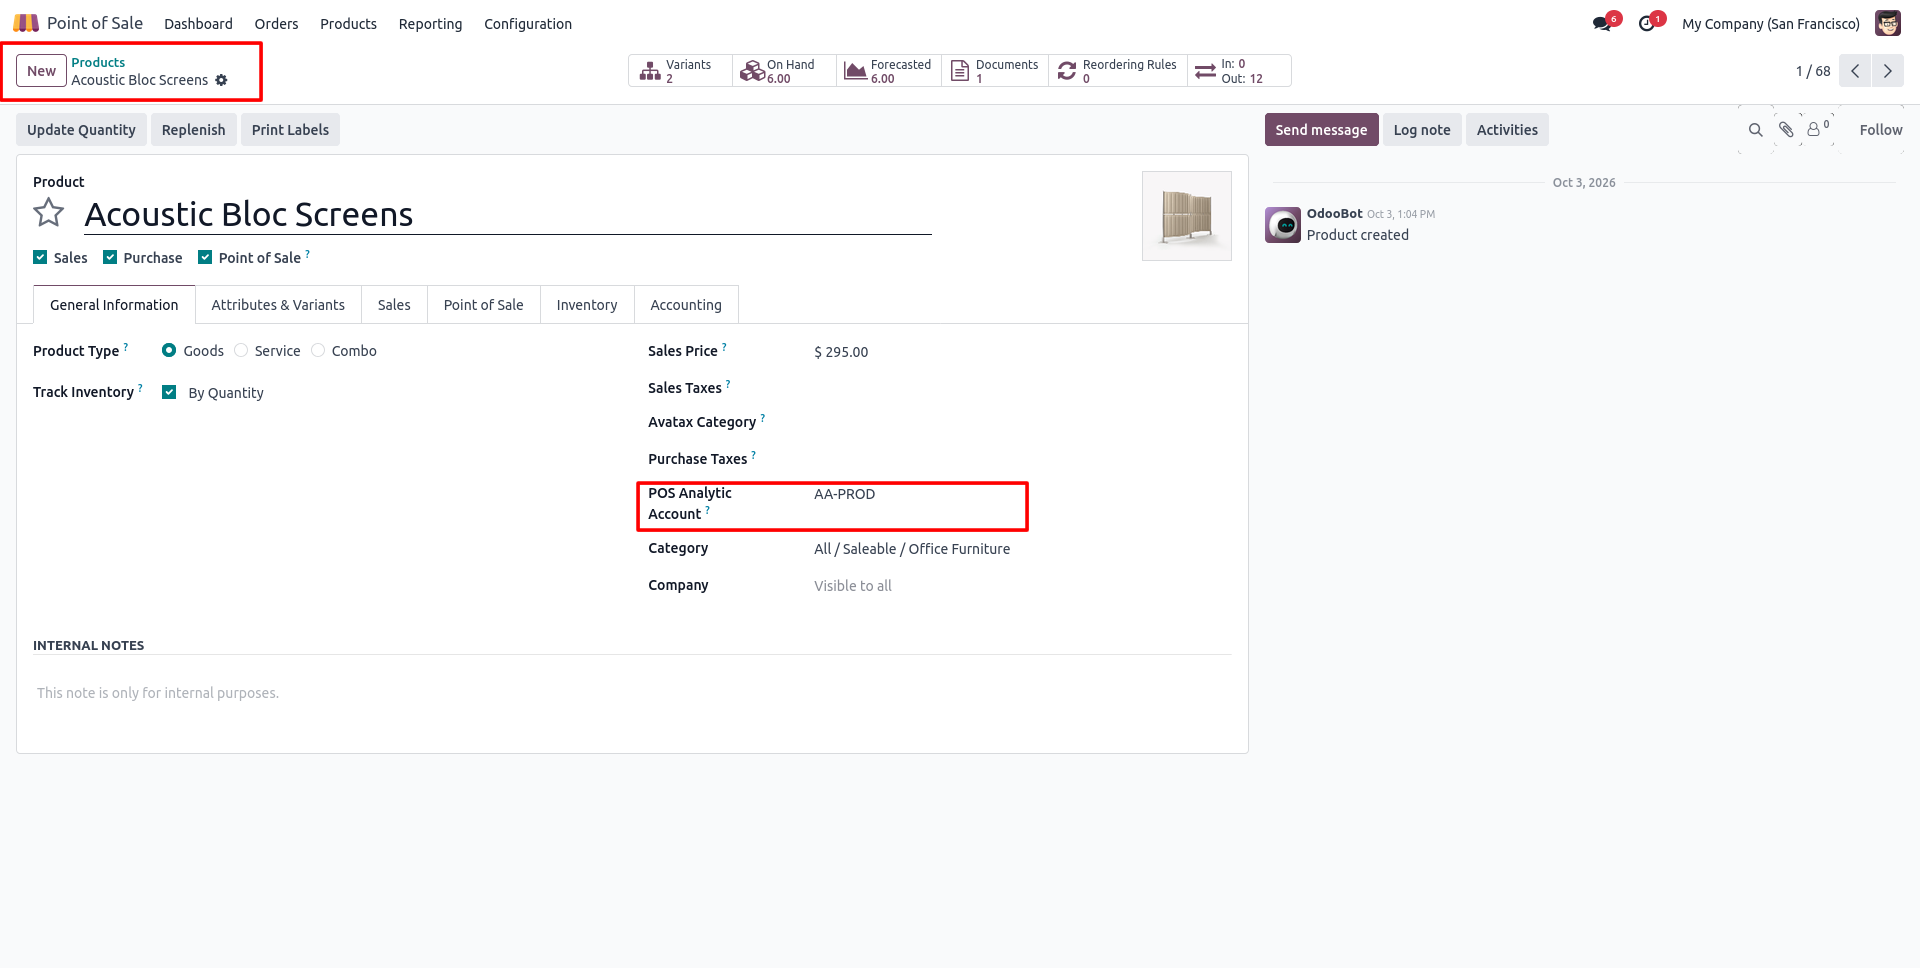
17. To tag a specific product, open the product form and set the POS Analytic Account on the General Information tab.
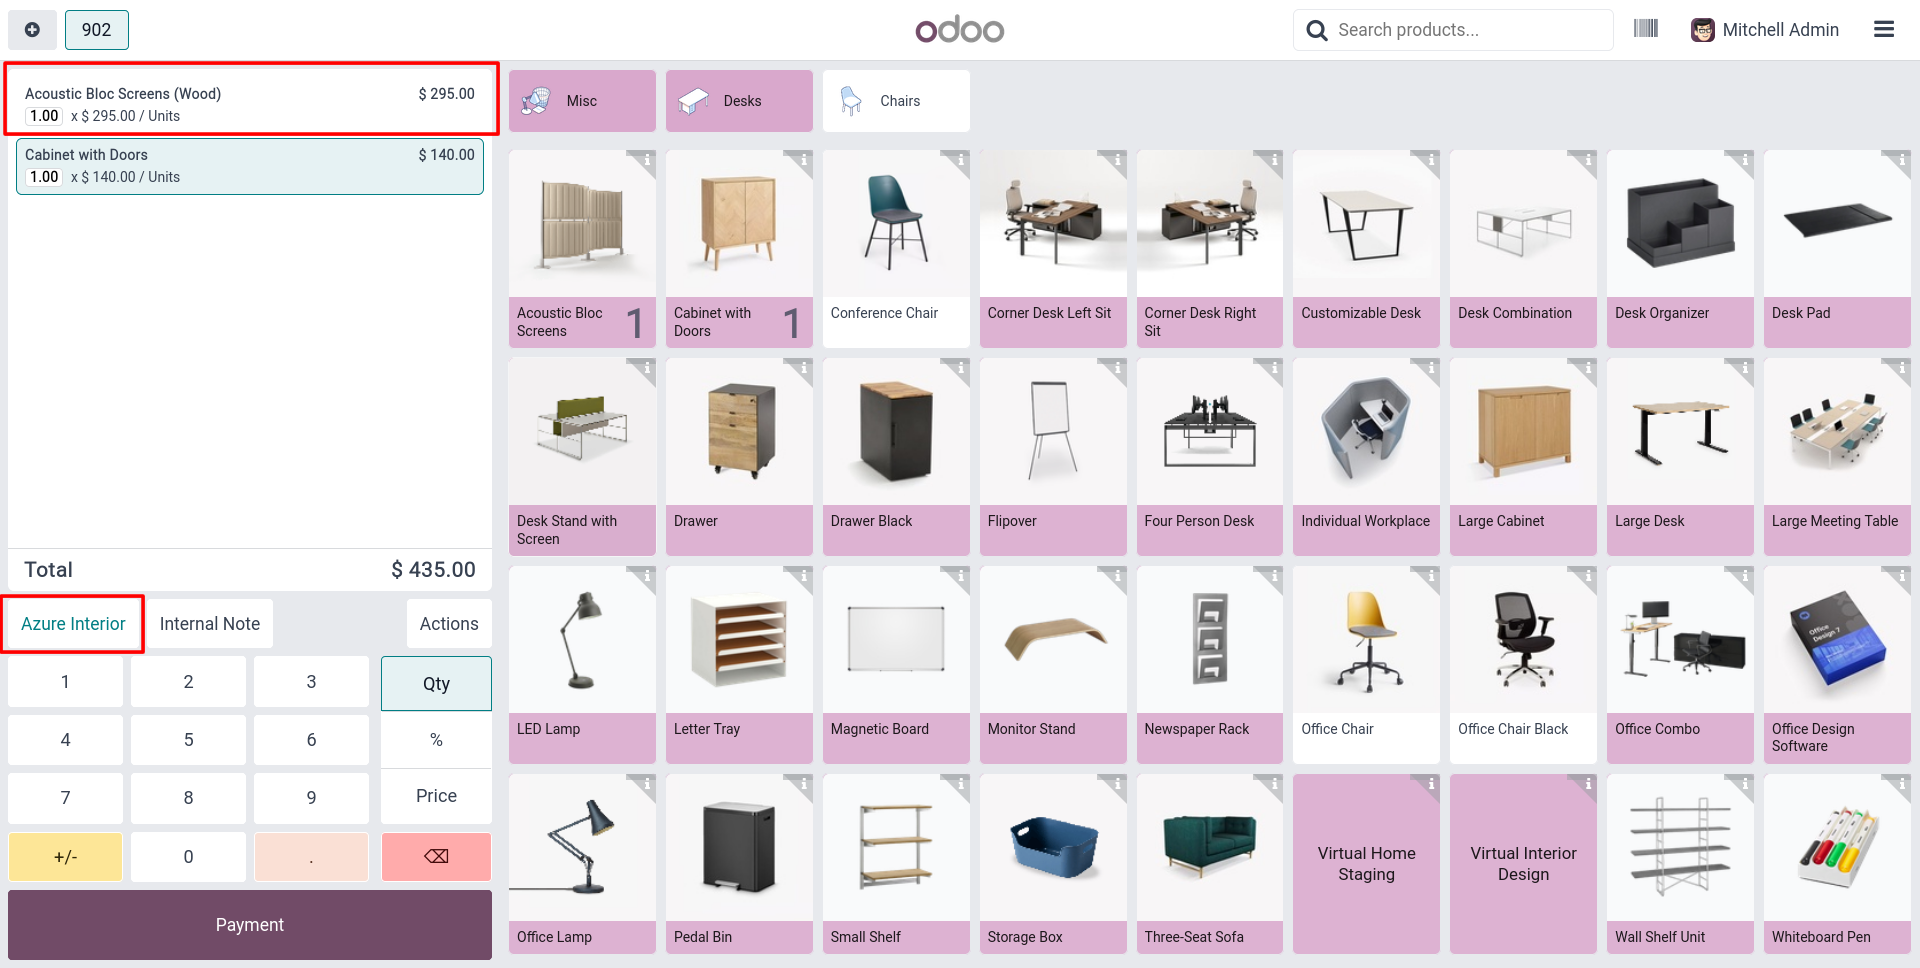
18. On the POS screen, select the customer and add that product along with other products to the order.
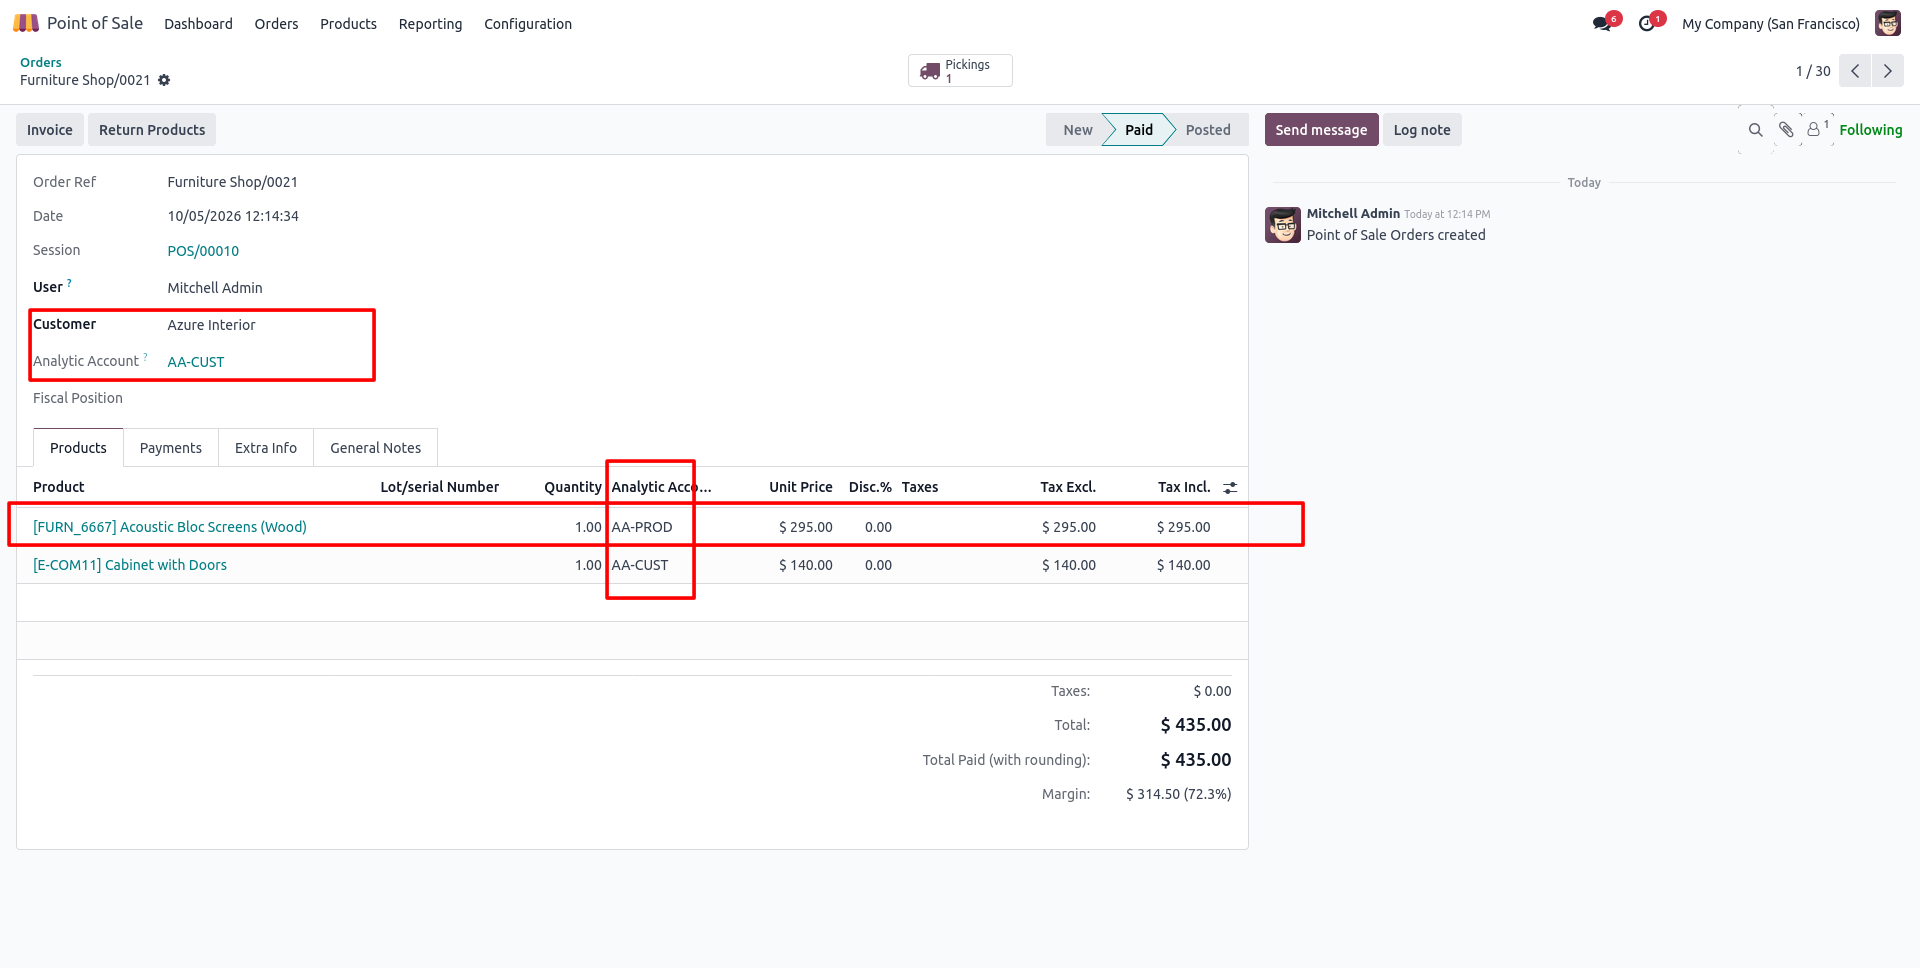
19. In the backend order, the product line uses the product's Analytic Account, while other lines use the order's Analytic Account.
Our solutions focus on your problems
- Odoo Implementation
- Odoo Customization
- ERP Development and Implementation
- Odoo Ipass Cloud
- AI for Odoo
- Odoo Apps
- Aws Marketplace Products
- Business Engines
Our Pricing includes User Manual, 90 Days Support (Monday-Friday 10am to 7pm IST) and One time Setup
• Works & tested on standard installations of Odoo with no third party apps,
• Free support only for odoo installations with no third party apps,
• Paid support available for Odoo installations with third party apps.

Prefortune is a Odoo Official Partner, Odoo Development company. Our philosophy is to use Open Source tools and technologies to provide cost effective and green solutions for our customers.
Prefortune Technologies LLP is working on web development, Mobile development, and Odoo ERP.
If you need any help or want more additional features, you may contact us through:
Alternative Products
These other products might interest you
Specifications
| Version | 20.0, 19.0, 18.0, 17.0, 16.0, 15.0, 14.0 |